
Tiling Toolbox – A List of the Tools You Will Need When Tiling Your Bathroom!
When installing ceramic floor tile in your bathroom you must make sure you have a solid level base to keep the tiles from cracking. Make sure everything is square and use a grid for accuracy. Having the proper tools readily available is also an important factor in getting the job done right the first time. Here are the tools of the trade you will need to complete the task at hand:
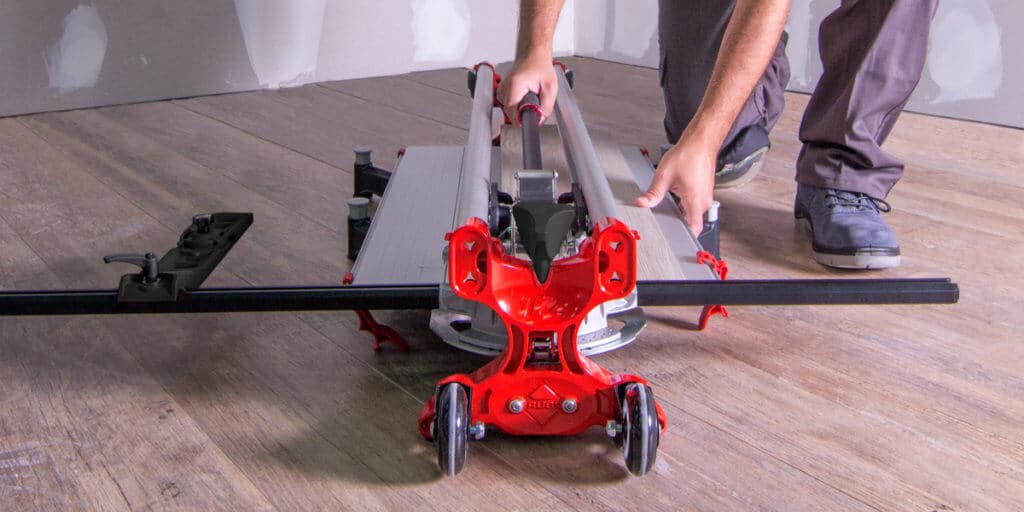
- A – Wet Saw. A wet saw speeds up the process when you have a lot of tiles to cut.
- B – Drill and Paddle. Get a heavy-duty drill and mixing paddle to mix the thin-set (used to bind tiles to the floor) mixture to the proper constituency.
- C – Plastic Bucket. Used for adding all your ingredients together when mixing thinset.
- D – Sponge. Used primarily for cleaning up grouted tile.
- E – Trowels. Specific to each job. Used for spreading mortar between the layout lines you have marked on the floor.
- F – Grout Float. Used to press the grout into the joints.
- G – Tile Nippers. These are used to chip away small pieces of tile when you are cutting circular or irregular shapes with your tile.
- H – Margin Trowel. Used to do dump or scoop out grout.
- I – Masonry Stone. Used to smooth or remove sharp and rough edges from the tile.
- J – Snap cutter. Used for making straight cuts. Makes cutting tiles easier by scoring the tiles.
Read more: How to Use a Ceramic Tile Saw
Some additional tools you will need are: tape measure, chalk line, a four-foot level, utility knife, and a hammer or rubber mallet. You can also get a 2-foot square ¾ inch plywood board you can kneel on so you do not squash the mortar out from underneath the tile as you are laying them down.
It’s always a good idea to mix the boxes of tiles (or lots as they are sometimes called) because the dyes may not all match. Doing so allows you to evenly spread the colors throughout the entire bathroom.
Layout two perpendicular rows of tile and intersect them in the middle to form a plus sign or cross. Dry-lay the tile in both directions, use the tile spacers but do not fill with grout just yet. Extend this process out from the middle of the room to the center of the four sides of the room so that you can determine the fit of the tiles on your bathroom floor. This process also makes sure the layout of the tile is square and even.
Mark the floor at several points of the grout lines. Remove the tile and then using the marks on the floor; snap a chalk line at the center pair of marks and continue to create a grid of layout lines that you will use to keep each tile straight and square when laying them down.
Read more: How to Drill Ceramic Tile
Laying tile is a little time consuming but not extremely hard. The main skills you will need are accuracy when measuring, mixing with a drill and the ability to trowel. Preparation is key, so have the tiles within easy reach. Find out how many you need and put them in stacks around the bathroom. Prepare the floor by first installing a backer board to prevent moisture seeping up from the floor underneath. Make sure to clean all surfaces and lastly have a grid to work from by snapping layout lines. Follow these steps and laying out tile in your bathroom will go a lot smoother than you imagined.
Read more: Glass Tiles in Your Bathroom