Installing a Bathroom Exhaust Fan

Bathroom exhaust fans are essential for your bathroom. Bathrooms tend to become humid, which makes your bathroom susceptible to mold, mildew, and bacteria. Eliminating this problem is as simple as installing an exhaust fan in your bathroom. A bathroom exhaust fan can include a light fixture because the light and fan use the same wiring. A bathroom exhaust fan will also circulate the air and help to eliminate odors.

Before you begin this project, be sure you have a permit and have your work inspected to avoid any safety issues. Be prepared to spend at least six to eight hours installing the fan.

Things you will need:

  • • Eye goggles
  • • Dust mask
  • • Phillips head and straight screwdriver
  • • Wire cutters or stripper
  • • Electrical tester
  • • Wire nuts
  • • Pencil
  • • Drywall saw or jigsaw
  • • Drill driver
  • • Electrical cable with a ground
  • • Dryer vent duct
  • • Dryer vent clamps
  • • A vent
  • • Bathroom exhaust fan

Read more: “Go Green” When Remodeling your Bathroom

Although it is highly recommended to follow complete manufacturers instructions, here are some simple steps for installing your own bathroom exhaust fan.

1. Turn off the power and then lock the power panel box. This is important to remember, so that no one tries to turn the power back on, especially if they do not realize that you are installing a fan.

2. Test the wires before you begin to be sure there is not any electrical current flowing through the wires. Wear your eye goggles and dust mask during the installation process.

3. If your ductwork needs to be run through the attic, mark the location and cut out a hole for the vent cap. When running your ductwork, try not to make too many twists and turns. Your exhaust fan will run more efficiently if it is as straight as possible.

4. Drill a reference hole.

Read more: Common Municipal Building Codes

5. On the ceiling, mark your lines with your pencil that will be cut. Cut the intake port hole.

6. Position the exhaust fan and secure it to the ceiling joists. If you are installing an exterior mount, cut the duct hole through the sidewall of the house.

7. Put on the wall cap and secure the exhaust duct to it.

8. Connect the wires.

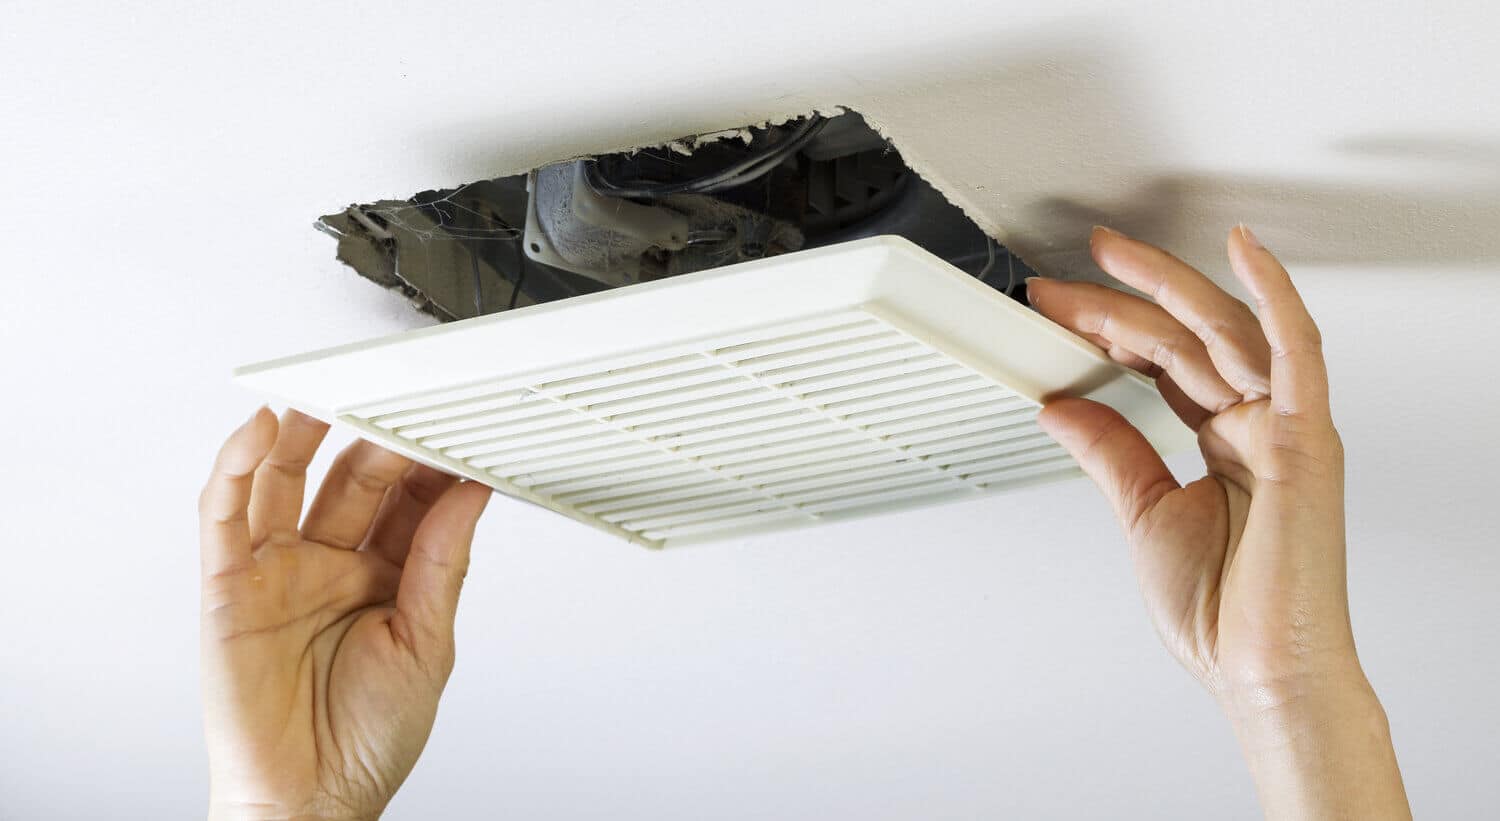
9. Make sure the grill is secured in place.

10. If the fan has a light fixture, attach the light bulb and then snap on the cover.

Read more: A List of the Tools You Will Need When Tiling Your Bathroom!

Don’t skip over the bathroom exhaust fan when you are planning your bathroom renovation project. The bathroom exhaust fan is critical to keeping the mold and mildew out and getting rid of those unwanted odors. Shop around for your exhaust fan before deciding on a basic one. There are even fans that have heaters included with them. At the very least, you should purchase one with a light. The heater exhaust fans could be a nice luxury addition to your bathroom.

Remember to have your work inspected by a qualified electrician if you are not qualified for electrical installations. You will be able to enjoy your new bathroom exhaust fan more if you know that what you have done is safe and up to code.

Read more: Squaring and Leveling Bathroom Tile

Placement of Grab Bars around Toilet: Reduce Injury With Grab Bars

Reports from consumer and government sources suggest that the bathroom is one of the most dangerous rooms in a home. Bath rails, also known as grab bars, are safety devices designed to help family members retain stability and reduce exhaustion while standing in the bath.

These accessories can hold some of your weight while maneuvering to sit on the toilet and allow you to have something to grab onto in case of a slip or fall on slippery bath floors, but there is more to these simple devices than meets the eye.

Once considered a luxury or simply a requirement for aging homeowners for tub and shower safety grab bars are now becoming the norm for middle-class households. And while they are commonly installed in locations that contribute to falls they can be placed in any area of the house to greatly increase safety in any home environment.

Bring Style and Security into your Bathroom

As their use has become increasingly popular, interior designers have learned to incorporate these accessories into the bathing facility not only as a safety component but also as a decorative element that sports an elegant style to enhance the space.

Manufactures have also caught on to the popularity of these items and have listened to consumer demand for more interesting railing designs to come out with an assortment of colors, shapes and sizes to meet the specialty and accessibility needs of specific individuals.

Read more: The Bathroom Renovation Contract

Injury Free Future

The most common reason to install grab bars is to increase accessibility and safety for individuals with a variety of disabilities or mobility issues but why wait for a mishap to happen. As common sense will tell you it’s best to have a map before you enter the woods because it will be too late when you get lost. Preparation is key to any successful endeavor. Not only will you not have to install one in the future but you will also be prepared if the unthinkable happens and you or a loved one slips and falls.

Choosing a Model

Researchers have found that the most comfortable thickness to hold on to for a grab bar is one that has a circumference of 1.25 to 1.5 inches that is installed approximately about an inch and a half away from the wall in order to grip the fixture effectively.

When choosing a grab bar model it’s important to select fittings that are durable. While there are various materials out there, a stainless-steel construction that supports up to 250 lbs. will guarantee longevity and sturdy support.

q? encoding=UTF8&ASIN=B07WSWMB6T&Format= SL250 &ID=AsinImage&MarketPlace=US&ServiceVersion=20070822&WS=1&tag=houserenotips 20&language=en USir?t=houserenotips 20&language=en US&l=li3&o=1&a=B07WSWMB6T

2 Pack Shower Grab Bar, Stainless Steel Bathroom Grab Bar

The material of the shower bar is 304 stainless steel, so there is no doubt about its firmness and safety, and it can support up to 500lbs. 

Read more: Factors to Consider When Choosing a Whirlpool or Air-Jet Tub

Increasing Accessibility at Home

Location, location, location, we have all heard how important this is in business, and believe it or not the same rule applies to homeowners. One of the most popular places to install a handrail is above the toilet bowl and on the adjacent wall next to the toilet where individuals using a wheelchair can support themselves while transferring to the toilet seat and back to their mobility device.

When grooming, these rails can also assist homeowners who have trouble sitting down. Another benefit of these handy supports is added stability if you have balance problems while seated or need help rising from a seated position, then a grab bar could effectively assist you with these matters.

Shower and Tub Fittings

The other common place to install handrails is in a shower or bathtub. Grab bars not only help the individual to maintain balance while standing upright or moving around but they can also be used to help in maneuvering in and out of the enclosure to lessen the possibility of injury.

Read more: Where to Place Your Bathtub Plumbing Fixtures

Assisted Living Trends

One of the new developments in assisted living is floor to ceiling grab bars called security poles. These full-length rods can be used in the bathroom or bedroom to help one get out of bed or get up from the toilet. And like most handrails can be used to help support caregivers to lift a person if they need to transfer the individual from one room to another.

If you are installing grab bars in a new bathroom reinforce them with blocking. On the other hand, if you are placing them in an existing facility you need to anchor the rails to your wall studs for added support. If only two of the three fasteners can be put on a wall stud due the length and placement of the bar then you can stabilize the remaining hole with toggle bolts.

Creating a Plan

Whether installed vertically, horizontally or diagonally, grab bars are commonly used in combination with other medical devices such as bath-lifts, shower chairs or handheld showers to increase accessibility and safety in the bathroom. While these are great places to mount these rails you should not limit yourself to these locations based upon convention. Grab bars can be placed on any wall or in any room where additional support is warranted, just be sure that the equipment meets ADA guidelines to ensure stability for many years to come.

Look around your home and ask yourself, what can I do to guarantee a safe living environment for myself and my family. I’m sure you’ll agree that these handrails are a step in the right direction to reduce injury at home.

Read more: How to Save Money Renovating a Bathroom

Installing Stone Tile in Your Bathroom

Installing stone tile in your bathroom can not only add the beauty of natural stone to your bathroom walls and floors, increasing the value of your home, but the best part is that installing stone tile in your bathroom is just as simple as installing ceramic tile in your bath, the only real difference in the tile installation process is that you will require a wet saw with a diamond blade due to the hardness of natural stone.

Limestone, marble, and granite are the bathroom designer’s stones of choice and while natural stone tiles may be slightly more expensive than ceramic tiles, the price has actually come down in recent years. The trend in stone tile size selection has increased over the years from subway sized tiles to much larger 12×12 inch or bigger tiles.

Summary: Installing stone tile in your bathroom can add the beauty of natural stone to your bathroom walls and floors giving your bathroom a sense of elegance. When handling and installing natural stone tile in your bathroom, you do have to be a little more careful than when working with ceramic tile. When installing stone tile in your bathroom you need to do a dry run by laying out your tiles to see if they will fit in the allotted space on your bathroom floor.”

When handling and installing natural stone tile in your bathroom, you do have to be a little more careful than when working with ceramic tile. This is primarily due to the fact that natural stone is not a manufactured material therefore the minerals that make up the stones pattern are distributed unevenly throughout the tile which could potentially make it brittle and subject to fracture along the mineral lines so try not to jar the tiles too much.

Read more: Choosing The Right Tool For Your Next Bath Remodeling Job

Another unique feature of natural stone tiles that you should be aware of when installing stone tile in your bathroom, is that some tiles may be slightly thicker than others, therefore you may need to adjust the amount of thinset underneath your tiles to compensate for this difference in thickness to make sure your stone tiles are level.

Tips For Installing Stone Tile

Due to the natural properties of natural stone when it is cut, there will be a thin layer of stone dust on the bottom of your tiles. This dust residue needs to be wiped off with a damp cloth and clean water before you install the stone tiles in your bathroom. If this is not done, it will reduce the adhesive ability of the thin-set to bond properly with the tile, to create a snug and stable tile floor. And don’t forget to let the stone tiles dry completely before you lay down your tiles.

Just like ceramic tiles, when installing stone tiles in your bathroom you need to do a dry run by laying out your tiles to see if they will fit in the allotted space on your bathroom floor. Next, you need to mark your layout grid lines on your lavatory floor by snapping out chalk lines to serve as guides to keep your tile square with your bathroom walls.

Pick up, count, and stack your tiles strategically in different sections of your bathroom floor so you won’t have to be going back and forth each time you need a tile. Mix your thin-set with a low speed (below 300 rpm) mixing drill or use a mortar paddle from your tiling toolbox and let it sit for about ten minutes before applying the mixture to your floor.

Read more: What You Should Know Before Hiring a Bathroom Remodeling Company

Apply the thin-set using a trowel to your bathroom subfloor inside the grid lines on the floor, but do not cover the chalk lines or else you won’t be able to see your grid. Also, apply some thin-set to the back of your stone tiles (called buttering the tile). Set and level the tiles (using a straight edge) on your bathroom floor within the confines of each grid, use plastic spacers between the tiles and adjust the tiles with a slight twisting motion to align your tiles along your layout lines. Continue installing your stone tiles in your bathroom, spacing the tiles as you go.

When installing stone tile in your bathroom, it’s sometimes a good idea to let the rest of your floor tiles (sometimes called field tiles) set overnight before you attempt to finish off your edge tiles as these will normally need to be cut because your bathroom floor is rarely if ever completely square and your tiles will sometimes be different sizes.

Cut the edge tiles using a wet saw with a diamond blade and bevel off the edges with a sanding block or sandpaper wrapped around a block of wood. Set your edge tiles in the thin-set mortar, remembering to butter the back of the stone tiles. Let the mortar cure for twenty-four hours. To finish up the process of installing stone tile in your bathroom you need to mix up a batch of unsanded grout, just enough to work on one small section of your bathroom at a time.

Read more: Do You Know What’s in Your Bathroom Walls?

As a special note, when installing stone tiles in your bathroom, they are naturally porous, so to avoid your tiles absorbing too much moisture from the grout you need to mist them using water from a spray bottle before you apply the grout to the tiles. Using a float, apply the grout over your stone tiles and remove the excess grout, wait about fifteen minutes and then using a damp sponge or cloth wipe off the grout haze from off the surface of your stone tiles.

It’s important to work in one small section of your bathroom floor at a time; this will ensure you are able to wipe off any excess grout haze before it has the opportunity to harden on your stone tiles. Continue the grouting process until your bathroom floor is completely grouted.

Let the grout cure based upon the manufactures specifications. Once the grout is dried, seal your tile and grout lines to care and protect your stone tiles and prolong the stone’s natural beauty. As you can see installing stone tile in your bathroom is not that different from installing ceramic tile in your loo but the elegance and atmosphere it creates are well worth the effort.

Read more: Fast Fixer-Upper Profits For Your Home and Bathroom

Window Blinds – How to Choose and Measure Bathroom Window Blinds

Deciding Upon the Perfect Window Blinds Treatment

There are many different decorative options you can use for your bathroom window blinds, from shutters to curtains to Venetian blinds. The main difference between curtains and blinds is that curtains open horizontally whereas blinds open and close vertically.

Not only do window blinds provide privacy and regulate the natural light into your bathroom, but they also add an important decorative appeal to the room. Other things that you should consider are the function of your window blinds if, for example, they are purely decorative, then you don’t need to purchase a more costly hanging system.

Your budget and overall theme of your bathroom will also determine your stylistic choice.

Read more: Cheap Bathroom Remodeling Solutions

Are your window blinds aiding in your relaxation, improving lighting conditions, or there to increase privacy? Before choosing the type of blinds you will use, first look at the shape and style of your particular bathroom window in order to determine your decorative alternatives.

Some common window types are sash windows, French windows, casement windows, picture windows, and bay windows. These all vary in size and scope so you need to adapt your window treatment accordingly.

When selecting windowblinds for your bathroom, it is important to consider the size of the window, the type of fabric and cord, and whether or not you need privacy shades.

If you have a smaller window, you may want to consider vertical blinds. These are made from a single piece of fabric that hangs down from the top of the window. They are easy to install and provide privacy without blocking sunlight or views. If you have a larger window, you may want to consider horizontal blinds. These come in many different styles and can be customized to fit your needs. They provide more privacy but may not block sunlight as well as vertical blinds.

The four main styles of blinds are:

Venetian Blinds: are slatted window blinds. These are the most common when people think of blinds and can be made of plastic, wood, or metal and can hang both inside and outside the windows frame.

VenetianBlinds

Roman Blinds: some subtlety overhang the window frame and are made from gently folded layers or material.

Read more: Small Space Bathroom Remodeling

Design Preference Will Determine the Position of Hanging Track

Roller Blinds: hang inside the window frame. They are flat simple pieces of material that you roll up or unroll to open or close.

Gathered Blinds: are made of gathered folds of fabric ( forming a number of scallop shapes at the bottom) to give your bathroom a more sophisticated feel.

Before you begin measuring for blinds you first need to decide on the position of the hanging track. It should be noted here that it is better to overestimate when calculating the amount of material you will need because it’s easier and more economical to trim the material than to buy anew.

Read more: Reasons to Remodel Your Bath

If you prefer to have your blinds outside the window recess then start your measurement at the tract, add approximately 1 ½ inch overlap from the outside of the windows frame on the horizontal and vertical axis of your window to below the sill.

Add another 2 inches to the bottom if you are attaching fabric to a dowel.

If on the other hand you prefer to hang your blinds on the inside of the window frame then calculations are much simpler as all you need to do is calculate the inside horizontal and vertical measurement of your window frame leaving about ¼ of an inch space inside the frame to facilitate movement of your roller or Venetian blinds.

When measuring for gathered blinds remember that an odd number of scallops are visually more appealing than an even number. Measure as above but add twelve inches to the basic height measurement to accommodate for the depth of the scalloped bottom edge when the blind is drawn down.

I hope these tips help you determine which window blinds are best for you and your family!

Read more: Five Mistakes to Avoid When Remodeling Your New Luxurious Bathroom

Inexpensive Tile Design Through Faux Tile Effects to Enhance Your Bathroom Floor

If you are on a remodeling budget but you’re tired of the bleak appearance of your bathroom, you can creatively solve the problem through faux tile effects. Instead of going through the hassle and expense of installing commercial flooring, you can simply paint your wooden subfloors or concrete basement floor to enhance your bathrooms overall appeal?

With a magnitude of different eye-catching designs, you can inexpensively paint your bathroom floor to mimic real flooring materials. The advantage to this is that it is far less expensive than installing the real thing but with intelligent planning, a visitor would be hard-pressed to tell whether the convincing impressions of your faux tiles are nothing more than a surreal looking finish.

Read more: How to Install Mosaic Tile in Your Bathroom

Commercially made floor paints are recommended for high travel areas but if money is a problem, then other paints can still be used as long as you apply a couple extra coats of varnish to protect the paint from too much wear and tear. It should also be mentioned here, that if you are using hardboard or chip board for your subfloor, you have to to be conscious that a number of brands may contain a fire retardant that is unsuited for painting. If you must know, the preeminent surface for creating faux tile effects is concrete because of its smoothness.

Any imperfections on your subfloor such as cracks or holes can be filled with all purpose filler, which you’ll have to sand down when dried to make a smooth ready surface. You can then seal the floor by using a commercial sealer. Plan your color scheme out ahead of time and use a complementary light colored paint for the first base coat to mimic the grout filling around the tiles. To make your job easier, use a roller (with or without an extension) rather than a brush to extend your reach and cover the area quickly then let it dry.

Read more: The Benefits of Marble Tile in Your Bathroom

How To Paint Faux Tile

You have the choice of creating your masterpiece freehand or you can measure out and draw a grid pattern on your bathroom floor to use as a guide. By means of a square object such as a sponge to absorb the paint, load the sponge template with the desired tile color and apply it firmly to the floor. If you are using a grid system try to stay within the confines of the grid outline you have created, just remember to leave gaps between the tiles to represent the grout.

A general rule of thumb is to create about eight to twenty tiles and then use a smaller piece of sponge to apply more paint to each faux tile. This gives the appearance of greater textural variation and increases the perception of depth to make your tiles seem more realistic. To create an even greater depth of field, you can also use marbling and sponging of a slightly darker or lighter hue of the same color to imitate a variety of different types of hard floor tiles.

Read more: Burst Water Pipe Bathroom Temporary Repair

A variation of the above method is to lay down a base coat, then create a large checkered board pattern on your floor. Tape down pieces of newspaper or cardboard in an alternating checkered pattern and spray paint another color over the uncovered squares. Let the paint dry and then remove the protective coverings to reveal a realistic picturesque faux checkered tile pattern.

Finish up with a few protective coats of varnish to seal in your design. Remember to let the varnish dry between each coat and you will have created a trendy new faux tile bathroom floor. This is an easy and creative way to save on your next bathroom remodeling project. Enjoy the fruits of your labor.

Read more: How to fix a broken tile without replacing it

The Bathroom Renovation Contract – Should You Always Get It In Writing?

The National Association of Home Builders and The Canadian Home Builders Association both stipulate that whenever you hire someone for bathroom renovation in your residence, it doesn’t matter the size of the job, you should always get a written and signed contract or statement of intent.

The more indepth and detailed the contract, the better. Even if you have been using the renovator for a while and you have a good working relationship there is still a short list of prerequisites that must be covered and agreed upon before the work can begin.

After all, a contract is nothing more than an agreement outlining the responsibilities of each party and the legal recourse of how problems will be resolved in case the renovation goes awry.

Read more: Using a Ceramic Tile Cutter

You never know what could happen: unforeseen accidents, damages or if for some reason the contractor’s skips town or can’t finish the job and then there is the possibility of claims by unpaid subcontractors.

All in all, this must be discussed and agreed upon by both parties involved and if you are unsure of a contact stipulation, you may also want to ask a lawyer to review the contract for clarification.

  • 1 – Contact information from both parties including GST or Business ID.
  • 2 – All contract documents (drawings, list of materials, blueprints, brands, models etc.).
  • 3 – Start and finish dates and a description of what work will be done.
  • 4 – Payment terms including schedule milestones plus taxes.

Read more: Using a Survey Checklist to Identify Problem Areas

Setting The Terms of the Arrangement

5 – Holdbacks – where you holdback a certain percentage for a specified time period to protect you against subcontractors that may put a lien on your home if the renovator doesn’t pay them.

6 – Extras and Deletions or Change orders (any change to the prices should be signed by both parties and attached to contract)

7 – Allowances (lump sum in the contract price for items such as fixtures or cabinets, flooring etc.)

8 – A contingency is money set aside to cover the cost of items that the renovator won’t know the definitive cost until the project is underway.

9 – Work standards refer to your renovator’s agreement to comply with regulatory bylaws and doing what is laid out in the contract.

Read more: Factors to Consider When Choosing a Whirlpool or Air-Jet Tub

10 – Proof of your renovators liability insurance.

11 – All inspections, permits and municipal approvals and who will obtain the necessary documents.

12 – The renovators warranty and how long it will last.

13 – The use of your home facilities including electricity, water, storage materials etc.

14 – Subcontractors who will be working on your home.

15 – Dispute resolution, usually including the name of a third-party mediator.

16 – Signage allowing your renovator to display promotional signs on your property during your bathroom home renovation project.

Read more: Where to Place Your Bathtub Plumbing Fixtures

How to Save Money Renovating a Bathroom: Hiring the Right Renovation Company

What to Look for in a Contractor

Tick tock, tick tock, time is passing by and your home won’t fix itself…So what is going to be the excuse this time…the dog ate the blueprints or maybe the stars were not correctly aligned? We know that sometimes coming to a decision can be difficult with so much uncertainty out there but you really should attend to your home before the problem gets out of hand.

As life would have it, there is never going to be a perfect moment to hire a bathroom renovations company but we can at least help you to get over the trepidation and get that wrecking ball going, so to speak.

If you’re like me, you have limited funds and you want everything to go smoothly. We have all heard stories from friends and family of “contractors gone bad” and if you need a refresher just check out Holmes on Homes on HGTV which highlights homeowners who have hired unscrupulous contractors. Not only did they have poor quality work done, they also had to endure weeks of delays and in some cases downright dangerous end results.

The reality of the matter is if you pick the wrong so-called professional, you may be left with a hefty bill with little to show for it and no funds to fix the situation. Remodeling is stressful enough without this unnecessary and preventable problem. You want to avoid being the victim at all cost.

Read more: Where to Place Your Bathtub Plumbing Fixtures

How to Evaluate the Company

This less than perfect scenario can be sidestepped by simply sitting down with your prospective renovator and asking a few simple questions to evaluate the company and can potentially save you the head ache of hiring a bad contractor. This is probably the easiest step in the selection process and will go a long way towards making sure your project is finished successfully, on time and within your budget.

Before getting in touch with any contractor you should try to get a sense of the renovation experts working in your municipality. This can be done by familiarizing yourself with the portfolio of previous jobs a contractor has worked on before.

While having a website does not guarantee they are legit, through photos and videos you can get an idea of the quality of work the company has done which will help you decide if their approach to design is the right fit for you.

Deciding How to Proceed

In a world full of exaggeration and bold claims, references are Gold! Once you have found a contractor that appeals to your wants, it is imperative that you check their references. The more associations and licensing boards they belong to the better because most of these homebuilders associations have to keep up with the latest industry standards and regulations taking place in the trades.

Not only will they have access to up-to-date trending information they will more than likely be abreast of current design ideas in home renovations. As an added bonus this may even give you some insights into what it would be like working with that particular contractor.

Read more: Factors to Consider When Choosing a Whirlpool or Air-Jet Tub

An important factor that most homeowners forget to ask a potential contractor is if they are insured (preferably in the area of one to two million dollars). Whether or not you have home insurance, you still need to make sure he is insured to protect both of you in case of any unforeseen complications or accidents on the job site. Having home insurance also sometimes allows you to get extra coverage when renovating, to cover any liabilities that may ensue on the premise.

How to Discover a Top Rated Professional

While most homeowners who have gotten this far feel that they have done their due diligence, don’t you make the same mistake. In other words, you need to dig just a little bit further. There are usually subcontractors, work crews, and different suppliers involved and it pays to at least be aware of the main players involved. A contractor who is open to disclose the people and processes involved will be more sensitive to your needs and will be easier to work with to get you the materials you are considering to finish your project.

Read more: Using a Survey Checklist to Identify Problem Areas

Whoever is renovating your home, you want to have a good working relationship with. Take your time, have faith in your intuition, after all this is your private space, you need to feel not only that you are making the right decision, but also that you can trust and talk freely with your contractor. Remodeling is an expensive and time consuming endeavor and you want your home renovations to proceed exactly as planned.

Interview several companies; ask all the right questions, view example of their work and follow up on references. Remember, choosing a contractor based upon price alone does not guarantee quality work. Hiring an outsider to update your home can bring both joy and trepidation but if you follow these guidelines then finding a reputable provider will be a fulfilling and memorable experience.

Read more: Using a Ceramic Tile Cutter

Planning Where to Place Your Bathtub Plumbing Fixtures When Doing a Bathroom Renovation Project!

Bathtub plumbing fixtures can be either coordinated or function as an individual piece. The main things to consider are the location, size and type of material you will use. Another important item to think about is whether or not the bathtub has special design features and where you will put plumbing access in case of an emergency.

Most bathtub manufacturer’s offer coordinated bathroom suites in matching colors and styles however there are also suppliers out there that create bathtub fixtures primarily to be mixed and matched with your existing bathroom décor.

Read more: Using a Ceramic Tile Cutter

Unlike other bathroom fixtures that can be readily replaced, the bathtub is somewhat permanent so your choices in style, color and location should be considered very carefully. The bathtub must be suitably positioned so as not to hinder the flow of users while at the same time be easy to get in and out of.

It should be noted here that if you plan on putting the faucet on the exterior wall that some municipal plumbing codes do not allow this due to energy conservation, so it would be in your best interest to check with your local authority on this matter.

Read more: 6 Safety Tools When Renovating Your Bathroom

To make plumbing access easier create a small door or panel that can be easily removed to allow access to the overflow and drain pipes. If it is difficult to locate the bathtub near the drain then you can raise the tub on a platform, now all you have to do is install the P-trap and drainpipe above floor height to an adjacent wall.

The bathtub is such a big prominent fixture, still, you can decide whether you want it to stand out or not. To make it dominate the room, even more, you can place it in the center of the bathroom or raise it on a platform. If on the other hand, you don’t want it to be the center of attention, position it in the corner or in its own private alcove.

This of course will furthermore depend on who will be using the bathroom. Can you bathe in the open or do you need to share your bathroom with other family members so a more intimate enclosure would be more appropriate?

Read more: Installing Stone Tile in Your Bathroom

Another important thing to bear in mind is the structural integrity of your bathroom floor. Depending upon the bathtub that you purchase, they can be quite heavy. Consider the size of the tub filled with water and one or two bathers. The other thing that will determine the ability of your floor to hold up your tub is how close it is to a bearing wall. Types of material and water capacity of the bathtub will also affect the weight of the tub.

The standard size of a bathtub is approximately five feet long and about thirty inches wide, so if you plan on installing a larger tub, get professional advice about the possibility of reinforcing your bathroom floor. And don’t forget the area surrounding the tub, there should be ample space to get in and out and convenient access to dressing areas.

Read more: Choosing The Right Tool For Your Next Bath Remodeling Job

Using a Survey Checklist to Identify Problem Areas in Your Existing Bathroom and Stimulate Your Creative Juices for Your New Vision!

Whether you are simply remodelling or wanting to do some major renovations by adding a bathroom as part of a home addition project, by addressing these following question you will not only identify the issues in your bathroom you want to tackle but it will also give you insight into the various design elements you should include in your overall design.

Just remember there is not one right answer, there is only the one that works best for your situation. Also the whole reason we are doing this, is to help you focus on particular problem areas in your existing bathroom and jump start your mind to the possible creative solutions you can come up with to solve those concerns.

First of all we must consider who will be using the bathroom. Ask yourself these questions.

  • How many people will be using the facility?
  • What are their ages and do they have any special needs such a child or older person with a disability? An example of this would be, are there grab bars installed or is the toilet or counter at a comfortable height?
  • Can the children reach the faucets? How about the person bathing them, will this cause back strain?
  • Are there any privacy concerns?
  • Are you expecting the need for an expanded bathroom due to a new baby or an in law moving in or is a sibling moving out?
  • Is your present bathroom being used for more than just grooming such as a laundry room or exercise equipment storage? Can these activities be done somewhere else in your home?
  • What about the future? Is a bathroom upgrade in your home improvement plans?

Next let’s take a closer look at your present bathroom.

Read more: Choosing The Right Tool For Your Next Bath Remodeling Job

  • Do you like what you see?
  • What is the first impression you get when you go inside your bathroom?
  • What do you like or don’t like about it?
  • What would you like to keep and what would you like to burn?
  • Do you like the current style?
  • If your bathroom has multiple entrances, do you think the style of the surrounding rooms fits well with the overall design, and how important is that to you?
  • Does any problem feature?

Storage space is another important factor you should consider.

  • Is there enough storage space in your bathroom to meet all your needs such as linen storage, medicine and cleaning products and small appliance grooming storage and is it being used as efficiently as possible?
  • What other items would you like to have close by but presently don’t have room for?
  • And do you like your items hidden or do you prefer open storage areas?

 What about your bathrooms space and layout?

  • Can everybody do what they need to do based upon the current layout?
  • Is there enough mirror and counter space?
  • Is there unused space that can be taken advantage of?
  • What about the placement of fixtures? Can you get around without squeezing or bumping into things?
  • Are the fixtures well placed to enhance their use?
  • Which fixtures are used most frequently and is the ratio to usage acceptable?
  • What about the door swing? Does this enhance or bottleneck the flow of traffic in and out of your bathroom?

Fixtures and fittings need to be addressed as well. Here we will examine the style of your present toilet, tub, shower, sink and any other fixtures you have in your bathroom.

  • Are they easy to clean and use?
  • Do they look old and outdated?
  • Are the controls on your faucets easy to operate?
  • What do you like about them? How about the colors?
  • Are there any exposed pipes or similar hardware and are they up to code?
  • Do you want to keep your fixtures or replace them?
  • Any style or particular manufacturer you have in mind?

To round off our bathroom survey checklist, we will now examine the remaining elements we need to address before we can fix any lingering problem regions in our bathroom. These areas include surfaces, accessories, heating, and any other special needs or spots of interest we need to focus upon.

As stated before there is no one right answer, there is only the one that works best for your present needs. Just remember the reason we are engaging in this survey is to help you identify the problem areas in your existing bathroom and jump start your creativity so that you can come up with viable solutions to get to the bottom of those concerns.

The small details and accessories in your decor will either enhance or take away from the overall design of your bathroom. From toothbrush holders to soap dispensers, every element plays an important role in the overall feel you are trying to create.

  • Do the cabinet handles go with the towel bars?
  • Does the hamper coordinate with the wastebasket?
  • What about the rugs or mats, do they match the shower curtains?
  • What about door handles and towel bars?
  • Even an uncommon item such as a book or magazine rack should be taken into consideration.

Your bathroom surfaces warrant your attention, these range from floor, wall, and ceiling coverings.

  • Are they easy to maintain?
  • What about the surfaces, are they old and worn, covered in mildew or mold?
  • Are they chipped, cracked, or discolored?
  • Is the shower enclosure still waterproof?
  • How about the tile grout, the silicone sealant, or the wall moldings?
  • Is the paint peeling due to excessive moisture?
  • Is the ceiling discolored?
  • What about all colors are they faded or vibrant? Do they still match?

Read more: Installing Stone Tile in Your Bathroom

When it comes to grooming, lighting is of uttermost importance. Also, the proper placement and quantity of electrical outlets will make it easier to use small appliances when blow-drying your hair or shaving, etc.

  • Is there adequate natural light?
  • Can windows be moved, made bigger, or add a skylight if possible?
  • And if so, would privacy become an issue?
  • Is there enough artificial light?
  • Is the lighting too harsh and does it cast weird shadows under your face, in other words, does it shine where you need it to shine?
  • Is it the right type of light for your purposes, incandescent or fluorescent?
  • What about the lighting fixtures? Do you like them or would they be better suited back in the 1960s?
  • Are there adequate mirrors and are they placed where you need them?
  • Are all electrical outlets, fixtures, heaters, and fans up to modern building code standards, and are you satisfied with their placement?
  • Are there any electrical appliances such as towel heaters or electronic fixtures you would like permanently installed in your bathroom and would you require an electrician to add them?
  • On the topic of ventilation, is there enough, and is it quiet and clean.
  • Is it warm enough in the bathroom on those cold winter nights and what is your heating source? Do you need an upgrade?

Read more: 6 Safety Tools When Renovating Your Bathroom

Pretty much all bathrooms have the regular amenities that you need in a bathroom such as a sink, toilet, and shower but what about the toys?

  • Will your existing plumbing and electrical wiring be able to handle the addition of a steam shower, whirlpool tub, or sauna?
  • What about multimedia? An addition of a TV or stereo system?
  • A fish tank or the addition of plants is also a great idea to round off your toys in your bathroom.
  • What about installing special handheld faucets so that you can bathe your pets?

So the choice is up to you. You can rip it all out and start over from scratch or you can simply upgrade the look of your present bathroom. Whichever you do this survey checklist will help you identify the shortcomings and the things that make your bathroom great. Look at the problems, mull over the possibilities and you will find that this will be a lot more fun than you first expected it to be.

Read more: Using a Ceramic Tile Cutter

Using a Ceramic Tile Cutter

Using a ceramic tile cutter is one way of ensuring a lovely finish to your ceramic tiles when remodeling your bathroom. However, not many homeowners know how to use a ceramic tile cutter and often find themselves with their backs against the wall and are eventually forced to hire a contractor instead to get their tiling job done.

Sadly, what most of them do not know is that using a ceramic tile cutter does not require great technical expertise and with a little practice, any do-it-yourselfer can install a professional looking ceramic tile floor in record time using ceramic tile cutting tools.

This fact is of particular interest to those that want to maintain a tight lid on their bathroom renovation costs and connect with their own project during the bath remodeling process. It’s pretty straight forward; you use a ceramic tile cutter to cut tiles. We will now examine the different types of ceramic tile cutters on the market and how each is used.

Summary: Ceramic tile cutters help you cut and shape ceramic tiles to your specifications. While using a ceramic tile cutter is not hard some such as the strikers does require some practice. The thickness and hardness of your tile will in some degree determine the type of ceramic tile cutter you will need to get the job done.”

Read more: Fast Fixer-Upper Profits For Your Home and Bathroom

The first thing to understand about ceramic tile cutters is that each type is specifically geared towards the material that has been used to make the tiles. Tiles that are hard to cut are usually made from porcelain or have an ultra-thin glazed surface.

The thicker the tile the more difficult it will be to cut and this is part of the reason why it is necessary to know two important things: what does my bathroom renovation project entail and what types of tiles will I be working with?

When these two basic questions are answered then it will be possible to know the ceramic tile cutter that you will need. Getting the wrong type of ceramic tile cutter for cutting floor and wall tile can result in an unnecessary waste of material and unsatisfactory results.

Read more: Do You Know What’s in Your Bathroom Walls?

Your bathroom renovation tiling project can be fun and fulfilling when the renovation process goes smoothly, so to get a feel for the tiling material it’s always a good idea to do some testing using a ceramic tile cutter on some extra ceramic tiles you have purchased just for this purpose. However, launching your bathroom renovation project without using some extra tiles for practice can lead to frustration and extra costs incurred along the way.

Renovations that include angled and tight areas will need a type of ceramic tile cutter known as Tile snips. These are one of the many manual ceramic tile cutters on the market and are excellent to use when both flooring and wall tile need to fit around areas that are curved and need extra precision to get a perfect fit.

Some common areas that you may use this type of ceramic tile cutter are: around pipes, decorated walls, fixtures, cabinets, and fill in areas. A pre-drawn shape would have to be placed on the tile with a marker and then this type of ceramic tile cutter will be used to make small cuts around the shape. It is best to make small cuts at a time so as to avoid mistakes and wrecking the tile. When using this ceramic tile cutter, rough edges that appear can easily be perfected by using a sharpening stone to make them smoother.

Read more: What You Should Know Before Hiring a Bathroom Remodeling Company

Another popular type of ceramic tile cutter is the wet diamond tile saw. This is more expensive than the tile snips mentioned above, but they are widely known for their precision and high results. Homeowners that will need to cut large quantities of ceramic tiles will find this option a worthwhile investment.

The diamond ceramic tile cutter is useful for thicker tiles such as: marble, granite, and porcelain. This ceramic tile cutter comes with a diamond blade that cuts through the tile while water accompanies the cutting direction. Due to the thickness of most tiles that are used with this ceramic tile cutter, the tension that is produced after scoring the ceramic tile is not enough to create a weak area to break the tile.

The saw is placed in a fixed position and the tile that needs to be cut is placed under the rotating saw and pushed towards it to get the required finish. This type of ceramic tile cutter is very flexible and is able to cut different shapes into a number of ceramic tiles.

Another type of ceramic tile cutter is the striker which is cheaper than the diamond tile saw and requires some degree of practice to get the desired results. This ceramic tile cutter is perfect for thin tiles and operates by scoring the ceramic tile with its metal blade.

When this is done a weak area is created and the tile is easy to snap in half. If you do not have a large renovation project, then this ceramic tile cutter is a great option. When cutting tile, it’s always a good idea to have a creative tile pattern in mind before you begin in order to keep your bathroom looking professional and unique.

Read more: Choosing The Right Tool For Your Next Bath Remodeling Job