6 Safety Tools When Renovating Your Bathroom

There are 6 safety tools that are crucial for a successful and injury-free home bathroom renovation project. The proper safety tools and their correct usage are requisites that should not be ignored when remodeling your bathroom. You will be utilizing all sorts of power tools and there will be chiseling and sanding and other similar potentially hazardous activities going on. In such an environment bathroom safety is and always should be your top priority – after all, you do want a beautiful, remodeled bathroom, but not at the cost of your safety or well-being so it is imperative to have on hand the right bathroom remodeling safety equipment when revamping your bathroom.

Read on for tips on bath renovation safety and all the information you need on the selection of 6 of the best safety tools you will require when renovating your bathroom.

Summary: These 6 safety tools are crucial when attempting an injury-free safe bathroom renovation project. Safety tools help protect you from sparks, flying debris, and fire hazards. Purchase good quality safety equipment to ensure your safety tools help you get through your next bathroom renovation without a hitch.”

Read more: Fast Fixer-Upper Profits For Your Home and Bathroom

What kind of safety gear do you need and why?

Figure out exactly what changes you intend to make in your bathroom and then go safety gear shopping based upon what you plan to do. If there is going to be a lot of dust or flying debris then safety eyewear is a must. Head on over to the nearest home improvement store and purchase quality safety equipment; budget shopping bathroom safety tools could be hazardous to your health and may not offer you the best protection.

Below is a list of 6 essential safety tools that almost all of you DIYers will require when remodeling their bathroom.

1. Safety Goggles or Safety Glasses – As far as bathroom remodeling safety tools go; this piece of protective gear tops it. With all the debris and sparks flying around, safety goggles are a must. Do not even think of attempting a home bathroom renovation without a pair of this protective eyewear, no matter how eager you are to commence!

There are moderate risks involved in working with power tools – these tools of the trade can be dangerous machines that throw off wooden splinters or produce sparking that may cause you a serious eye injury or even blindness.

Grab some protective safety goggles before you do any DIY renovation and if you have prescription eyeglasses, then place the lenses inside the safety goggles so your eyes will always be protected. See my favorite safety goggles here.

Read more: Do You Know What’s in Your Bathroom Walls?

Safety Tool Tip #1 – Choose your eye protection with care and precision – the goggle shaped ones will keep the dust and paint out and the shatter-proof ones will prevent any wayward flying material to come in contact with your eyes.

Safety Tool Tip #2 – Get good quality ones rather than good-looking ones!

2. Work Gloves or Safety Gloves – Beautifully done home renovation is a mastery of your hands – so protecting your hands is next on our list of bathroom remodeling safety tools.

Rubber gloves or leather gloves? Spandex or garden gloves? And does one size fit all here?

All valid questions – the DIY market is flooded with work glove choices – from cowhide multi-task leather gloves that guarantee freedom from the cold weather and sharp wooden splinters to cheap, latex disposable gloves or electrically insulated rubber gloves for any kind of home renovation endeavor that involves electricity above 50 volts. Choose your work gloves with care and sensibility – again, you want safety to be your top priority, not budget buying or pretty looks.

Safety Tool Tip #3 – Get disposable latex gloves for any work involving chemicals or nitrile coated disposable ones for any paintwork.

Read more: What You Should Know Before Hiring a Bathroom Remodeling Company

Safety Tool Tip #4 – Check out the size too – long-length will be useful in a DIY plumbing.

3. Dust Mask and Face Shield – Since you’re in for a DIY bathroom renovation, there will most definitely be dust, paint fumes, and/or flying metal shards, hence these two safety tools that you must get.

A box of disposable dust masks can easily be bought off Amazon or your nearest home décor store. Just grab one before you go sweeping off the debris on the dusty bathroom floor.

A face shield guards and protects your face from any small, sharp object that can wound you while you work.

Safety Tool Tip #5 – Choose a dust mask and a face shield that are tight-fitting and secure.

4. Respirator – Admit it – you will not only be hammering and chiseling away when renovating your bathroom. There might be tasks that could lead to inhaling toxic fumes from paint solvents or the humidity along with the chemicals you’re working with might give you a headache and make you fatigued and hence more accident-prone. That’s why you need a respirator, for your well-being and health safety, till the end of your dream remodeling project.

5. Hearing Protection or Ear Muffs – If high-decibel power tools are going to be used, then good quality ear muffs are a must. Long-time usage of loud devices can irreversibly damage your hearing.

6. A-B-C Rated Fire Extinguisher – You never know when the unthinkable can happen. This fires safety tool is compulsory for a DIY bathroom renovation project. Just get one that has an A-B-C rating which means that it will work on all kinds of fire – electrical, wood, metal etc.

Safety Tool Tip #6 – Pick one that’s handy to carry and use. A bulky bottle will waste precious seconds if a fire flares up.

Surviving a bathroom renovation is quite simple once you have the right safety tools and know their proper usage.

In closing, here are a few more pointers to keep you safe when working on your bathroom:

• Read all manuals and respect your tools. Store them in a spot where you can easily locate them the next time you need them. Clean and check your tools periodically.

• Wear snug and long-sleeved protective clothes.

• No jewellery – it can get stuck in a machinery.

• Clean the work area as you move along the project. Mess means accidents waiting to happen.

• Power off all electricity before any work involving electricity.

• Always call a professional or seek help, when in doubt and always remember – better safe than sorry.

Read more: Choosing The Right Tool For Your Next Bath Remodeling Job

Having these 6 essential safety tools in your repertoire will ensure you are safe when renovating your bathroom. Safety advice should always be at the back of your mind when performing any kind of renovation, after all, you want to be able to enjoy and admire all the hard work you put into your bathroom when everything is done. While safety tools are important, choosing the right tools to perform the job when remodeling your bath is also something you should keep in mind.

Choosing The Right Tool For Your Next Bath Remodeling Job

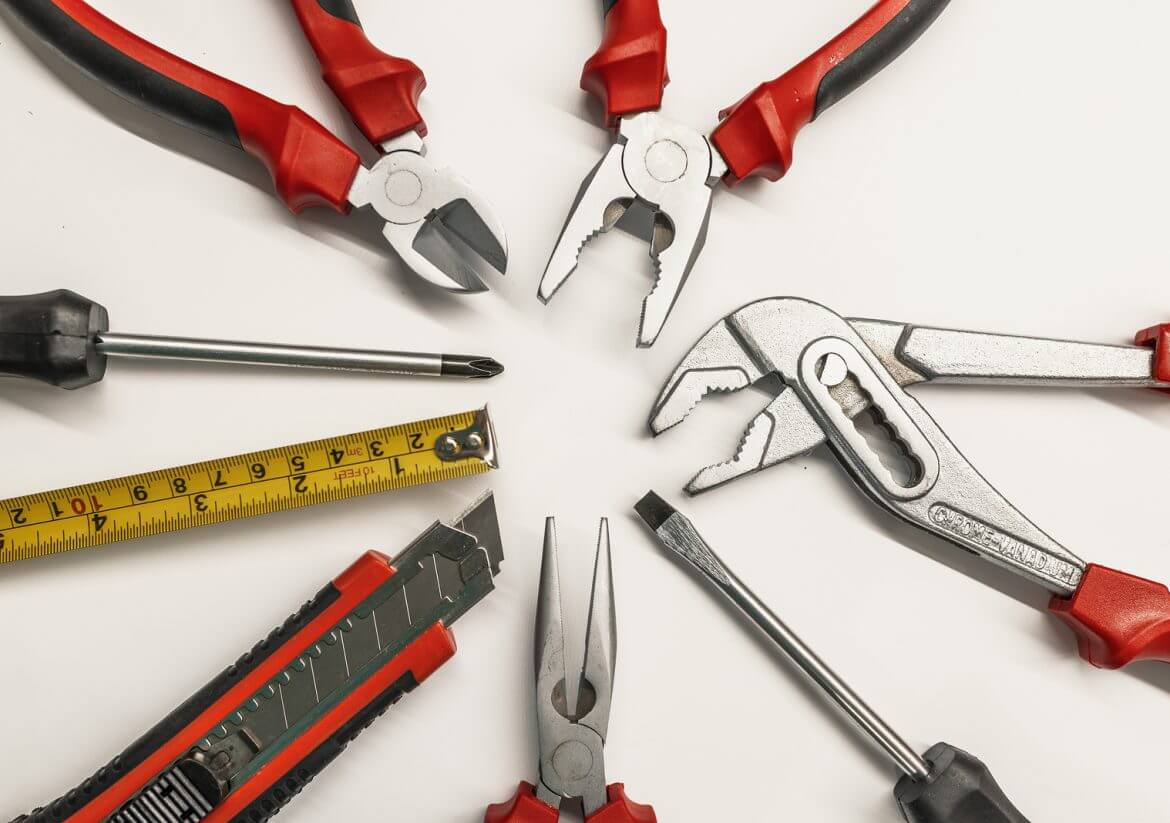
Learn how to pick the right tools. A bathroom remodelling project covers many different tasks and pulls together many diverse trade skills; from plumbing to dry walling, to wiring and even carpentry. When performing these tasks, you need the right tool for the job. This is one instance where the saying goes, “You are only as good as your tools…” holds true. With each task comes a new set of tools.

Acquiring quality tools is not an option to get the job done quickly and efficiently, not to mention your time and money when you have to stop in the middle of your bathroom renovation to go back to the home improvement center to replace a broken tool. Some of the tools you may already have in your repertoire, but others you will need to purchase online or at your local Home Depot store.

One way of justifying the cost is to look at the new tools as an investment in future ventures because you will probably be using them again in some other home improvement project. Also if you think about it, purchasing new tools will probably be less expensive than hiring out a contractor anyway.

Read more: Fast Fixer-Upper Profits For Your Home and Bathroom

Before you purchase anything you should do some research. Find out who are the leaders in the tooling field such as DeWalt and Stanley. Compare their products with other cheaper ones. You will be surprised that even by holding a tool you can feel the tactile quality of the brand, through weight, size and product production materials. Also don’t forget to read power tool reviews before you lay down your hard earned money.

As a side note, always check the electrical cords of your power tools to make sure they are sturdy and not in any way compromised by cracks or frayed in anyway. It should be noted here that you don’t always have to purchase new tools, you can get some incredible deals on top brand name tools from second hand shops or online from homeowners who no longer have any use for them.

Read more: Preparing Your Bathroom for Renovation

A top of the line power tool should have all options readably identifiable, triggers and functions should be easily accessed and the tool itself should be safe and easy to use. There should be no flaws in the manufacturing process with smooth finishes and precisely assembled housing compartments made of sturdy materials such as steel.

As previously stated, tools are an investment, so protect your investment by storing your tools in tool boxes when you’re not renovating and keep like tools together so you can easily find them when you’re ready to get your remodelling project on track. Whether you need carpentry, wiring, drywall, plumbing or tiling tools, remember to buy the best complete set of quality tools you can reasonably afford.

Read more: Installing a Bathroom Exhaust Fan

What You Should Know Before Hiring a Bathroom Remodeling Company so You Don’t Get Scammed!

You’ve Been Scammed! What You Should Know Before Hiring a Bathroom Remodeling Company. So what do you do now? Having a remodeler redesign your bathroom could be a pleasant experience or can turn out to be your worst nightmare. If you do not choose a qualified and experienced remodeler, your bathroom remodeling project could literally cost you a small fortune and could be a very disappointing venture. Knowing what to look for in a remodeler, is the first step to hiring the “right” person for the job.

Do your research before trusting a remodeler to redesign your bathroom

• Ask for referrals from friends, family, neighbors, co-workers and anyone else you know who has had remodeling work done.

• Contact independent trade contractors or building material suppliers for referrals

• Check to see if the remodeler you have in mind has professional certifications, such as a Certified Graduate Remodeler (CGR) certificate.

• Talk to trade associations, such as the Remodeler TM Council, or use the national list of local NAHB Remodelers in your area. The National Association of Home Builders

Once you have some idea of who you would like to consider as a remodeler for your bathroom, you should do even more research to be sure this is the remodeler for what you have in mind for your new bathroom.

After you have narrowed down your search, contact the local Better Business Bureau to be sure there are not any unresolved complaints about this remodeler. You should check to be sure the remodeler you have chosen has the appropriate licenses’ needed by contacting your state’s local contractor licensing agency and state and building inspectors.

Read more: Fast Fixer-Upper Profits For Your Home and Bathroom

Check References

Just because a remodeler hands you a list of people as a reference, does not mean these references are valid. It is up to you to contact the references on this list to be sure they are valid and take the time to interview the references. If at all possible, try to make an appointment in their home so that you can look at the remodeler’s work. Listed below are some questions to consider asking at the interview.

• Would you use this company again?

• Did the remodeler clean up his work area when finished for the day?

• Did they show up when they said they would?

• Did they finish the project according to the deadline?

• Did they keep the project within the budget?

• Was the remodeler easy to get along with and open to your opinions?

• Did they keep the lines of communication open with you regarding the project?

Protect yourself from scams

Sadly, there are people out there that will take advantage of you. They will take advantage of your excitement of remodeling your bathroom and are really excellent with the sales pitch. They can reel you in by making you feel that you can trust them. These scam artists’ know what you are looking for in a remodeler, and they will try to make you think they can give you exactly what you need. They will make you trust in them so that you do not feel obligated to check into their references. They will then ask for that big down payment and skip town.

Read more: Preparing Your Bathroom for Renovation

You need to be the one to protect yourself from these types of people. There are warning signs that can tip you off to someone who is trying to pull a fast one on you.

• If a contractor is soliciting business door to door with a high pressure sales tactic, you should pass this one up. There are plenty of respectable remodelers out there that do not need to resort to these pushy sales pitches.

• If you can’t verify the remodeler’s name, address, phone number or credentials. Beware. This is a sure sign of a scam and you’d better call the Better Business Bureau in your area to report the incident.

• If the remodeler claims to be endorsed by the Federal Housing Administration for the Title 1 Home Improvement Loan Program, you should definitely check into this. This is a scam that is common. More information can be obtained about this type of advertising from the Department of Housing and Urban Development’s web site.

• If the remodeler does not give you references or if the references he gave you were not happy with the work, you should just pass this one up.

• If you were asked to pay for the entire job in advance, definitely beware. You should never be asked to pay for an entire job up front.

Read more: Installing a Bathroom Exhaust Fan

Something important to know, if you do sign a contract and decide you are not sure, you can cancel an agreement up to 72 hours if the contract was signed somewhere other than the remodeler’s place of business, such as your home. This is a law under the Federal Trade Commission’s “Cooling-Off Rule”.

Take some time to know what you should be looking for in a remodeler and check his or her references to ensure your bathroom renovation project will be exactly how you envisioned it. And don’t forget to contact The Canadian Home Builders Association or The National Association of Home Builders to find the best contractors in your area.

Read more: Do You Know What’s in Your Bathroom Walls?

Fast Fixer-Upper Profits For Your Home and Bathroom – Is it Really Worth the Investment?

So your house is a “fixer-upper” or maybe you are looking to flip a house to make a quick profit. One of the most important areas in your home to consider sprucing up besides renovating your kitchen is remodeling your bathroom. And though the initial investment might seem a bit much, the return on your investment after you have sold the property and pocketed the profits will definitely put a smile on your face and a hop in your stride. 

While investing in real estate is not in the scope of this blog it should be noted here that if flipping houses is something that you want to do, then you should be aware of the importance bathroom upgrades will play in ensuring you sell the home in a reasonable amount of time and with a good ROI for your efforts.

Whether you are an opportunity seeker looking for Fast Fixer-Upper Profits or you are looking to sell your present place of residence becoming a real estate investor (house flipper) could turn out to be one of the best financial decisions you could ever make.

Read more: Preparing Your Bathroom for Renovation

There are many sources out there that will steer you in the right direction on how to find the bargains and then resell them for incredible profits, so we won’t even touch on this. Just don’t let your fear of failure stall your engines before you even begin, especially when you can learn to make your money work harder for you. As with most things in life, there is no guarantee that remodeling your bathroom will make your house sell but it will definitely increase the chances of your success.

An important thing to consider when working on your bathroom upgrade is to keep it as uncluttered and as streamlined as possible; remember you are not remodeling to please yourself, you are trying to make your bathroom appeal to the mass majority of people that will come to view the house, so keep the designs and decorations simple and trendy.

Read more: Installing a Bathroom Exhaust Fan

There is a general misconception for people to think that to sell a house quickly is the result of luck or you need to have a crew of home decorators up your sleeve or there must be some sort of magic involved. But the fact of the matter is once you have the right blueprint for fixer-upper success then the ensuing decisions on how to proceed with your bathroom remodeling project will simply fall in place.

Make no mistake, you will have to go through trial and error but with practice and persistence, you will start to see patterns and develop formulas to make the renovation process run smoothly, and eventually, you will be able to rely on a network of suppliers and experts you can go to.

If you would like to shorten the learning curb and get started as soon as possible, then there are also programs out such as Fast Fixer-Upper Profits that will teach you proven ways to buy fixer-uppers with little or virtually no maintenance and sell them for thousands of dollars in profits. You do the math. Cha! Ching!

Read more: Common Municipal Building Codes

Preparing Your Bathroom for Renovation – Planning, Skills, Patience, and Safety!

Before you dive into any bathroom renovation or remodelling job it’s always a good idea to create an objective checklist to make sure you are actually ready and able to begin the tasks ahead. Look at the entire project with a critical eye. Leave no stone unturned.

First and foremost give yourself a realistic amount of time to get each undertaking done. A complete bath redo involves careful planning, a certain amount of skills, patience, and the ability to work safely. Most people don’t even realize that it usually takes a day or more depending upon the complexity of your renovation project to remove wall coverings and about eight to twelve hours to accurately mark the positions of your fixtures.

Read more: Common Municipal Building Codes

Preparation is key. Have your level, drill, hole saw, framing square, hammer, pry bar, jigsaw, reciprocating saw, circular saw and what ever else you may need stored in a logical place within easy reach as you progress through the stages of your bathroom reno plan. And the same goes for whatever materials you may need such as lumber for any framing you may need to do.

To expand your bathroom you might need to build a new wall. Just make sure that it is not a load-bearing wall. Even if you’re just a little bit unsure it would be in your best interest to avoid a disaster and check with a professional carpenter or structural engineer before proceeding any further.

Don’t fool yourself; you will need basic carpentry skills to get by here. Always remove drywall and plaster from around the vicinity you will be running any plumbing. Plan for where your plumbing runs. And yes you will also need a good understanding of the rudimentary skillset and procedures of plumbing.

Read more: “Go Green” When Remodeling your Bathroom

You will also have to formulate some sort of plan of hooking up the new plumbing with what is already there. This is where paying a plumber for his/her advice is worth its weight in gold. It’s also worth mentioning again how important it is to measure carefully and accurately. Special attention should be paid to drain vents and make sure you purchase pipe types and sizes that conform to your municipal building codes.

Getting the plumbing right is very important because you don’t want to have to tear things out or apart just to fix a boo, boo and as a precaution, it’s always best to pre-approve your plumbing plans by your local building department.

Clear out all cabinetsfixtures and any other décor elements that may prove to be an obstruction or hinder your work in any way. It is of the utmost importance that you shut off the power if any wiring is in the path of the plumbing. And test to make sure the circuit is really off just to be on the safe side. You may even have to temporarily remove cables, which is fine because it’s usually a good work practice to run any electrical cables after the plumbing has been installed.

Read more: A List of the Tools You Will Need When Tiling Your Bathroom!

As an afterthought, avoid running any pipes in your exterior wall because the last thing you want happening is for your pipes to freeze during the colder months of the year causing unnecessary water damage.

Above all work safe. Wear the proper safety attire to protect yourself from scrapes and cuts: gloves, a mask, eye protectors etc. Don’t overexert yourself either. Plan your breaks. And remember a complete bathroom renovation involves thorough planning; maybe even some advanced or at least competent plumbing skills.

Get a good helper and work in a steady patient manner because this could be the most challenging do-it-yourself project you may ever undertake. But you know what? It will all be worth it in the end.

Read more: Squaring and Leveling Bathroom Tile

Common Municipal Building Codes – Electrical and Plumbing Codes When Running New Lines in Your Bathroom

Building codes were first established to ensure safety through the standardization of materials and installation training when performing home renovations. As it turns out when you are renovating your bathroom you will probably touch on many different areas of production, including wiring, plumbing, and possibly structural work. This may require you to get hold of a permit or get an inspection before you can proceed with your remodeling project.

In the beginning stages of formulating your strategy contact your municipal planning department to get any necessary documentation and information about local electrical and plumbing codes. If on the other hand, you are simply replacing a fixture you will not need to contact your local municipality.

Read more: A List of the Tools You Will Need When Tiling Your Bathroom!

Start by drawing up an accurate plan with a complete list of all the materials you will be using. Be sure to make an appointment ahead of time so you know you will have an allotted amount of time to ask questions, take notes and present your ideas to the building authority to get their feed back. And don’t forget to ask whether or not it is necessary to hire a trade professional in order to meet code criteria.

Depending upon what has to be done, don’t make an inspection appointment until all the changes are actually done, and remember don’t cover up any work so the inspector can accurately critique all aspects of the electrical and plumbing modifications.

Read more: Squaring and Leveling Bathroom Tile

These rules only apply if you are running new lines in your bathroom. When working with plumbing don’t place the fixtures too close together. Most drains, supply lines and vents will use a 4 or 3-inch PVC pipe for the primary drain and 2-inch PVC for the auxiliary drain lines and vents. JFYI you can make your pipes run quieter by surrounding the pipes with insulation. If you plan on using cast-iron or copper pipes it is usually best to get these installed by a professional. 

Drain pipes should slope approximately one-quarter of an inch per running foot and ventilation pipes about one-eight of an inch per foot. Another thing to remember is to reinforce joists that have been cut to run piping through them. And don’t forget to caulk around all pipes and place protective plates over the pipes where necessary.

Read more: The Definitive Guide to Solving Bathroom Storage Problems and Regain Your Sanity!

Some of the more common requirements when working with electrical lines include the use of plastic electrical boxes. Make sure you attach number 12 wires to 20-amp circuits and number 14 wires to 15-amp circuits. Fixtures and appliances should be Underwriters Laboratories approved and all new installed appliances and receptacles have to be grounded. For bathrooms, most North American house use 120V circuits so all lights need to be on a 15-amp circuit.

Also remember, all light fixtures need a sealed lens or globe to keep out moisture. You should also take into consideration a fan or heater may require its own circuit due to the amps it may pull. The non-metallic cable is standard in most homes but you may need armored cable or conduit if your cable is to be exposed instead of running through your drywall.

These are general guidelines for most municipal building codes, its always best to check with your local authority just to be sure no additional specifications need to be applied in your particular area.

Read more: Glass Tiles in Your Bathroom

“Go Green” When Remodeling your Bathroom

“Going green” is the new way of life. People are taking control of their environment and learning that they can make a difference. Usually when someone plans to “go green”, they are considering changing to a more natural lifestyle. Bathroom remodeling probably does not pop into their minds in their plans for going green.

While there are many products available to help you with your plans of “going green” with your cleaning, there are also things you can do when you create that new bathroom.

Creating a green bathroom is one of the easiest rooms to convert. You will be able to immediately do your part in helping the environment just by changing out fixtures that were manufactured before the water conservation mandates in 1994. Manufacturers have been paying attention to the consumer’s needs and have been developing more recyclable and sustainable products.

Read more: A List of the Tools You Will Need When Tiling Your Bathroom!

Your water bill can be lowered significantly just by using low-flow water fixtures, this can save you thousands of gallons of water each year. It is time to create an energy efficient bathroom and learn ways to reduce the water we use. In fact, in Australia, water is scarce and they have to recycle their water. We need to take control now so we do not have to wonder where our water is going to come from. We need to take steps now to make sure our environment will be able to sustain us in the future.

Indoor air quality is also a factor in the bathroom. The bathroom is subjected to heat and humidity. Ventilation is extremely important, especially when you mix heat and humidity with cleaning chemicals and hygiene and cosmetics products.

Although there are natural cleaning, hygiene, and cosmetic products you can purchase, you need to also reduce volatile organic compounds (VOC) in the bathroom. These are found in building materials, such as cabinetry, adhesives, caulks, and paints. VOCs can cause many health issues, ranging from asthma to cancer.

Read more: Squaring and Leveling Bathroom Tile

“Going green” can sometimes feel overwhelming because of all the unfamiliar terms. Here are some tips to help you create a “green” bathroom.

• When purchasing your cabinets or vanity tops, look for materials that are made from wheat board or other low-VOC materials. Regular cabinets can off-gas harmful VOCs for up to 15 years because they contain urea-formaldehyde.

• Make the switch in your lighting to fluorescent with electronic ballasts or halogen lighting. If at all possible, get as much natural light into your bathroom as possible. You will save on energy and the electric bill!

• It is important to have a vent fan to help to eliminate odors, airborne irritants and moisture that can possibly lead to mold. You should run your vent fan for at least 25 minutes after a shower to remove all of the moisture.

Read more: The Definitive Guide to Solving Bathroom Storage Problems and Regain Your Sanity!

• When purchasing your tub and shower, try to choose recycled glass, ceramic or porcelain tile for shower surrounds. Grout that is thinner and not sanded and that have light colored epoxy grout, except white, are not as prone to mold and mildew.

• When considering an eco-friendly bathroom floor, look into natural tile and natural linoleum. These are your best choices. Vinyl sheets and man made tile products are not good choices for a green bathroom.

• Check to make sure the caulks, adhesives and sealant labels you use say that they are low or have no VOCs. Many of these items contain some type of mold inhibiting compound so that it makes cleaning easier, which helps you use less harmful cleaning products. However, many of these could be harmful. So, check the labels.

Each person can make a difference in our environment. The more energy we conserve and the more water we save will help to ensure a brighter future for our families. So, the next time you remodel your bathroom, consider incorporating “green” into your design.

Read more: Glass Tiles in Your Bathroom

Tiling Toolbox – A List of the Tools You Will Need When Tiling Your Bathroom!

When installing ceramic floor tile in your bathroom you must make sure you have a solid level base to keep the tiles from cracking. Make sure everything is square and use a grid for accuracy. Having the proper tools readily available is also an important factor in getting the job done right the first time. Here are the tools of the trade you will need to complete the task at hand:

  • A – Wet Saw. A wet saw speeds up the process when you have a lot of tiles to cut.
  • B – Drill and Paddle. Get a heavy-duty drill and mixing paddle to mix the thin-set (used to bind tiles to the floor) mixture to the proper constituency.
  • C – Plastic Bucket. Used for adding all your ingredients together when mixing thinset.
  • D – Sponge. Used primarily for cleaning up grouted tile.
  • E – Trowels. Specific to each job. Used for spreading mortar between the layout lines you have marked on the floor.
  • F – Grout Float. Used to press the grout into the joints.
  • G – Tile Nippers. These are used to chip away small pieces of tile when you are cutting circular or irregular shapes with your tile.
  • H – Margin Trowel. Used to do dump or scoop out grout.
  • I – Masonry Stone. Used to smooth or remove sharp and rough edges from the tile.
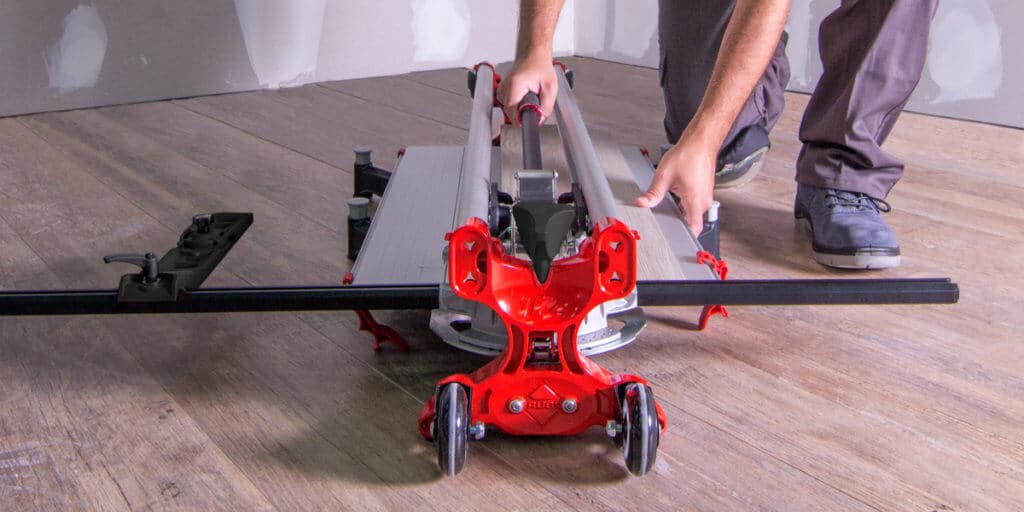
  • J – Snap cutter. Used for making straight cuts. Makes cutting tiles easier by scoring the tiles.

Read more: How to Use a Ceramic Tile Saw

Some additional tools you will need are: tape measure, chalk line, a four-foot level, utility knife, and a hammer or rubber mallet. You can also get a 2-foot square ¾ inch plywood board you can kneel on so you do not squash the mortar out from underneath the tile as you are laying them down.

It’s always a good idea to mix the boxes of tiles (or lots as they are sometimes called) because the dyes may not all match. Doing so allows you to evenly spread the colors throughout the entire bathroom.

Layout two perpendicular rows of tile and intersect them in the middle to form a plus sign or cross. Dry-lay the tile in both directions, use the tile spacers but do not fill with grout just yet. Extend this process out from the middle of the room to the center of the four sides of the room so that you can determine the fit of the tiles on your bathroom floor. This process also makes sure the layout of the tile is square and even.

Mark the floor at several points of the grout lines. Remove the tile and then using the marks on the floor; snap a chalk line at the center pair of marks and continue to create a grid of layout lines that you will use to keep each tile straight and square when laying them down.

Read more: How to Drill Ceramic Tile

Laying tile is a little time consuming but not extremely hard. The main skills you will need are accuracy when measuring, mixing with a drill and the ability to trowel. Preparation is key, so have the tiles within easy reach. Find out how many you need and put them in stacks around the bathroom. Prepare the floor by first installing a backer board to prevent moisture seeping up from the floor underneath. Make sure to clean all surfaces and lastly have a grid to work from by snapping layout lines. Follow these steps and laying out tile in your bathroom will go a lot smoother than you imagined.

Read more: Glass Tiles in Your Bathroom

Squaring and Leveling Bathroom Tile

Squaring and leveling bathroom tile is a skill you must learn when installing a ceramic tile floor. A problem that many novice bathroom renovators have when laying tile for the first time is uneven bathroom floor tiles. Creating beautiful professional-looking floor tiles is not that hard if you know the skills necessary to square and level your bathroom tiles.

Many beginner bath renovators are surprised to find that most bathroom walls are rarely perfectly square, so in order to compensate for this problem, you have to determine if your bathroom floor tile will need adjusting for a visually appealing fit. Finding the center of your bathroom floor and dry-laying your floor tiles will help to minimize squaring and leveling your bathroom tiles if you simply mark and follow layout lines you have chalked in on your bath floor.

Similarly, using a four-foot carpenter’s level on the edge of your ceramic tile will also ensure your tiles are straight and lined up properly and as a final measure, gently tapping high areas with a beater block and a rubber mallet will flatten any surface abnormalities for a professional-looking tiled bathroom floor.

Summary: Squaring and levelling bathroom tile is a three step process. To begin squaring and levelling your bathroom tiles your first must square your tiles to the rest of your bathroom. Developing a grid, utilizing a carpenter’s level and tapping down uneven tiles with a beater block and rubber mallet will ensure a professional look when squaring and levelling bathroom tile in your lavatory.”

Read more: How to Use a Ceramic Tile Saw

The last thing you want to do is stub your toe or trip over raised tile when stepping out of your shower. Squaring and leveling your bathroom tiles will alleviate this concern. When laying out the tile on your bathroom floor it will be necessary to square and level your bathroom tiles to create a professional-looking and safe ceramic tile floor.

Perfectly square bathroom walls are a rarity in any home so here is a simple way to determine if your bathroom floor is at right-angles in order to visually square your tile layout with the rest of your bathroom. Find the center of your bathroom floor area by first finding the midpoint on opposite walls and snapping a chalk line across the room to form a perpendicular (cross hairlines) at the midpoint of your lavatory so the lines are at right angles to each other.

Read more: How to Drill Ceramic Tile

From the center point measure out three feet on one line and four feet on the other perpendicular line and mark the points. Now connect the two points to form the third line of the triangle, if that third line measures five feet exactly then your bathroom floor is square. When squaring and leveling your bathroom tile you may need to adjust the lines until the third line measures five feet exactly. Unfortunately, if your bathroom walls are really out of whack you may need to cut your edge tiles to accommodate your bathroom’s skewed dimensions since you need to start tiling from the center of the room and work your way out towards the edges.

When squaring and leveling bathroom tiles, your next step to ensure straight tiles is to dry-lay your bathroom tiles in both directions along the chalk lines from the center of the room. You are laying down the ceramic tiles without the mortar but using the joint spacers in between the individual tiles so you can get a feel of how many tiles you will need and later create a grid to place your tiles in. Initially, you are forming a plus sign in the center of your bathroom with the tiles you have laid on the floor. Use a four-foot carpenter’s level on the edge of your ceramic tiles to make sure all the edges line up along the level.

When you are satisfied that your tiles are straight when squaring and leveling your bathroom tile, mark the floor beside the tiles at the juncture of each tile where the grout will be filled in between the tiles. Pick up your tiles and then using the marks on the floor, snap chalk lines in the center of the marks on your bathroom floor. Using the remaining center marks on the floor, continue snapping chalk lines along your bathroom floor to form a grid of chalk lines you will later use as a layout when setting your ceramic tiles.

Read more: Glass Tiles in Your Bathroom

To continue squaring and leveling your bathroom tiles, spread thin-set inside the lines of your chalk layout and set in your floor tiles, inserting spacers between the tiles to ensure you will have enough room between the tiles for the grout.

Needless to say, some spots of thin-set mortar will be thicker than others and you will have to gently tap the tiles level. To rectify this problem take a two-by-four and wrap it with a piece of carpet or similar shock-absorbent material (lovingly called a beater block) and using a rubber mallet, which should be part of your tiling toolbox, gently tap the tile in place so it is flat and level with the other tiles.

And to ensure your bathroom floor tiles are straight, run your handy carpenter’s level along the edge of your bathroom tiles to straighten the joints. As you can see squaring and leveling bathroom tile is straight forward and doable by anyone. Don’t be intimidated by bathroom tiling projects because just like the professionals, once you know how, the sky is the limit. Happy tiling!

Read more: The Definitive Guide to Solving Bathroom Storage Problems and Regain Your Sanity!

The Definitive Guide to Solving Bathroom Storage Problems and Regain Your Sanity!

Don’t you hate it when you’re in a rush in the morning and you can’t find your toothbrush or that favorite shade of lipstick? When you’re on a schedule and minutes count, time can’t be wasted trying to find razors and hairdryers or bobby pins. If only you were more organized then you wouldn’t have to stress out each morning trying to find the things you use every day in your bathroom.

Well, you know what they say, “Awareness is the first step to recovery,” and you, my friend, know the problem all too well. Have no fear because after you are done reading this article and applying the principles, you will be on the road to creating a smooth traffic flow for all users of your bathroom during peak usage times.

First let’s examine the top usage time, the morning rush hour dash for the bathroom. Scheduling and limiting the time family members spend in the bathroom is a good start. But there should be a little leeway for something going wrong, compromise is not a four-letter word, an example being, someone can be taking a shower while someone else brushes their teeth. Yet you should try to stick to the schedule as closely as possible to ensure individuals don’t begin to take advantage of the situation and put everyone else off schedule. A good way to remind everyone whose turn it is is to place a pad or chalkboard outside the bathroom door listing the person and the time allotted to them.

We have discussed in a previous article how to unclutter your bathroom, now we will go into further detail on the best practices of how to organize the things that you use in your bathroom for optimum efficiency by creating a more effective storage system. For starters, having lots of drawers and cabinets will keep your bathroom looking neat and organized. In the bathroom you can never have too much storage space.

Read more: Back to Basics – Bathroom Vanity Countertop Materials Simplified

First Aid and Medicines – It is pretty much a given that every home should have basic first aid supplies. Because of its clean towels and running water, the bathroom is a good place to store these items. Allocate one specific container or drawer for first aid things and put nothing else in there but those items; you don’t want to have to dig through a whole bunch of stuff to get to the bandages in an emergency. Make sure everyone knows where it is in case of a crisis and make sure it’s in an easily accessible spot.

The benefit of putting all first aid items in one container is that you can take out the drawer or container and move it to where the injury occurred instead of having to move the patient if that is not an option. The best place to store medicines as well, in the medicine cabinet. Labels should be facing out for quick scanning and arranged in a logical manner such as kid medication on top while adult medication can be stored below or beside it in a group. It should be noted here that medication should be stored away from the curious hands of children but easily reached by adults.

Shaving Accessories – These items should be kept near the sink but out of sight such as in a shallow drawer or bin below the vanity or the lower shelves of a medicine cabinet are good hiding places. Electric razors can be kept neatly in their cases on the vanity near an outlet and mirror or a designated drawer under the vanity.

Tooth Care Products – There are many bathroom accessory sets that allow you to easily organize your toothbrushes and toothpaste, ranging from wall mounted units to countertop units. A narrow shelf above a pedestal sink also works well. Just make sure to store the items in plain sight within easy reach of the sink. There is also the alternative of storing your tooth care products in your medicine cabinet if counter space is at a premium.

Read more: Do-It-Yourself Corner Ceramic Shower Seat Installation

Grooming Accessories – When it comes to personal grooming items, the optimal solution is to store these things away from the high traffic area of the bathroom. Drying your hair or applying makeup can be done in the bedrooms as long as there is ample light and a place to sit. A dressing table with shallow drawers to store and organize your makeup and a mirror would be ideal. If that is not possible, a handy all in one makeup storage case on your bathroom countertop would do nicely to keep all your makeup in one place and reduce counter clutter.

Because of its bulkiness, a deep drawer in a vanity cabinet is the best place to store hairdryers and other bulky items like hair crimpers and curling irons. As noted above, it would be best to store them away from the bathroom if everyone is on a schedule. Brushes, combs, hair clips, and accessories for easy touch-ups, can be stored in a shallow drawer under the vanity but if you plan on doing your daily routine of 100 brush strokes to bring out that shine, then take it to the next room and vacate the bathroom for someone that really needs to be in there.

Read more: Practical Storage Solutions

Soaps, Shampoos, and Creams – Buying these items in pump form not only saves space on the counter, but can add flavor to the décor by your choice of decorative containers. Most of these items are refillable so you can buy in bulk and in the end save some money. Shower caddies will help to organize your soaps, shampoos, and other bathing accessories, keeping these items within easy reach and plain view.

Towels – Heated towel racks not only keep your towels toasty and dry; they can also be used to organize your towels for each member of the family depending upon the model that you purchase. Hanging your towels on the back of your bathroom door with a multi-clothes hanger will keep your cottons separate and organized. Installing pegs in your bathroom walls is also a great way to organize your towels.

Read more: How to Use a Ceramic Tile Saw

Fresh towels and washcloths can be stored on open shelves or pull-out bins in a vanity or in an adjacent linen closet next to the bathroom for easy access. But what about those damp towels? Purchasing a bathroom hamper is one solution to keep those dirty towels and washcloths out of sight. The other is simply hanging them on your heated towel rack until you are ready to take them down to the laundry room.

Cleaning Supplies – The last thing that we want to mention is cleaning supplies. Slide-out drawers under the vanity would be the optimal solution but if this is not doable then a simple bucket or plastic container behind the toilet or under a stool would be an alternative. Needless to say, if you have kids, dangerous chemicals should be kept behind secured doors or in child proof storage containers.

Whether you use drawers, shelves, trays, tubs, bins, pegs, hooks or bars, the best storage solution must be suited for the item it stores and aid you in de-cluttering and organizing your bathroom. Using the right means of storage will make sure things are where they should be when you need them which translates into you getting in and out of the bathroom in a timely manner.

Read more: How to Drill Ceramic Tile