Tub Faucets

Transform Your Bathing Space With Style and Grace

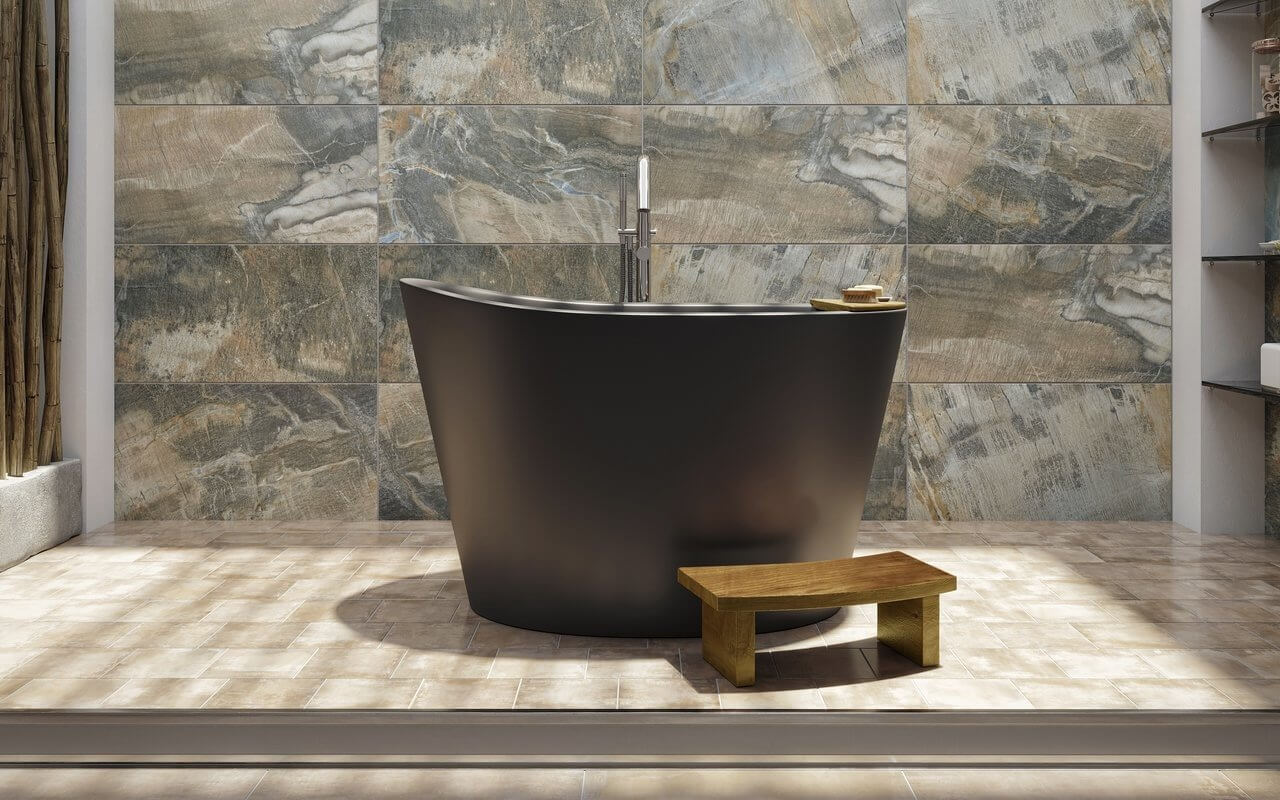
Tub faucets are among the many bath fixtures that are a vital part of your bathroom environment. This is primarily due to the fact that these fixtures don’t merely deliver water to bathtubs, they also help the bath function at its best as well as add a whole new level of style and grace.

While there may be many bathtub fixtures and faucets to choose from, it is important to point out that in any washroom renovation project, tub faucets should be chosen to create a certain balance between functionality and having a beautiful bathing space.

As a first time renovator, try to avoid the newbie mistake of buying tub fixtures on price alone and don’t get confused when the question of functionality or esthetics is placed on the table.

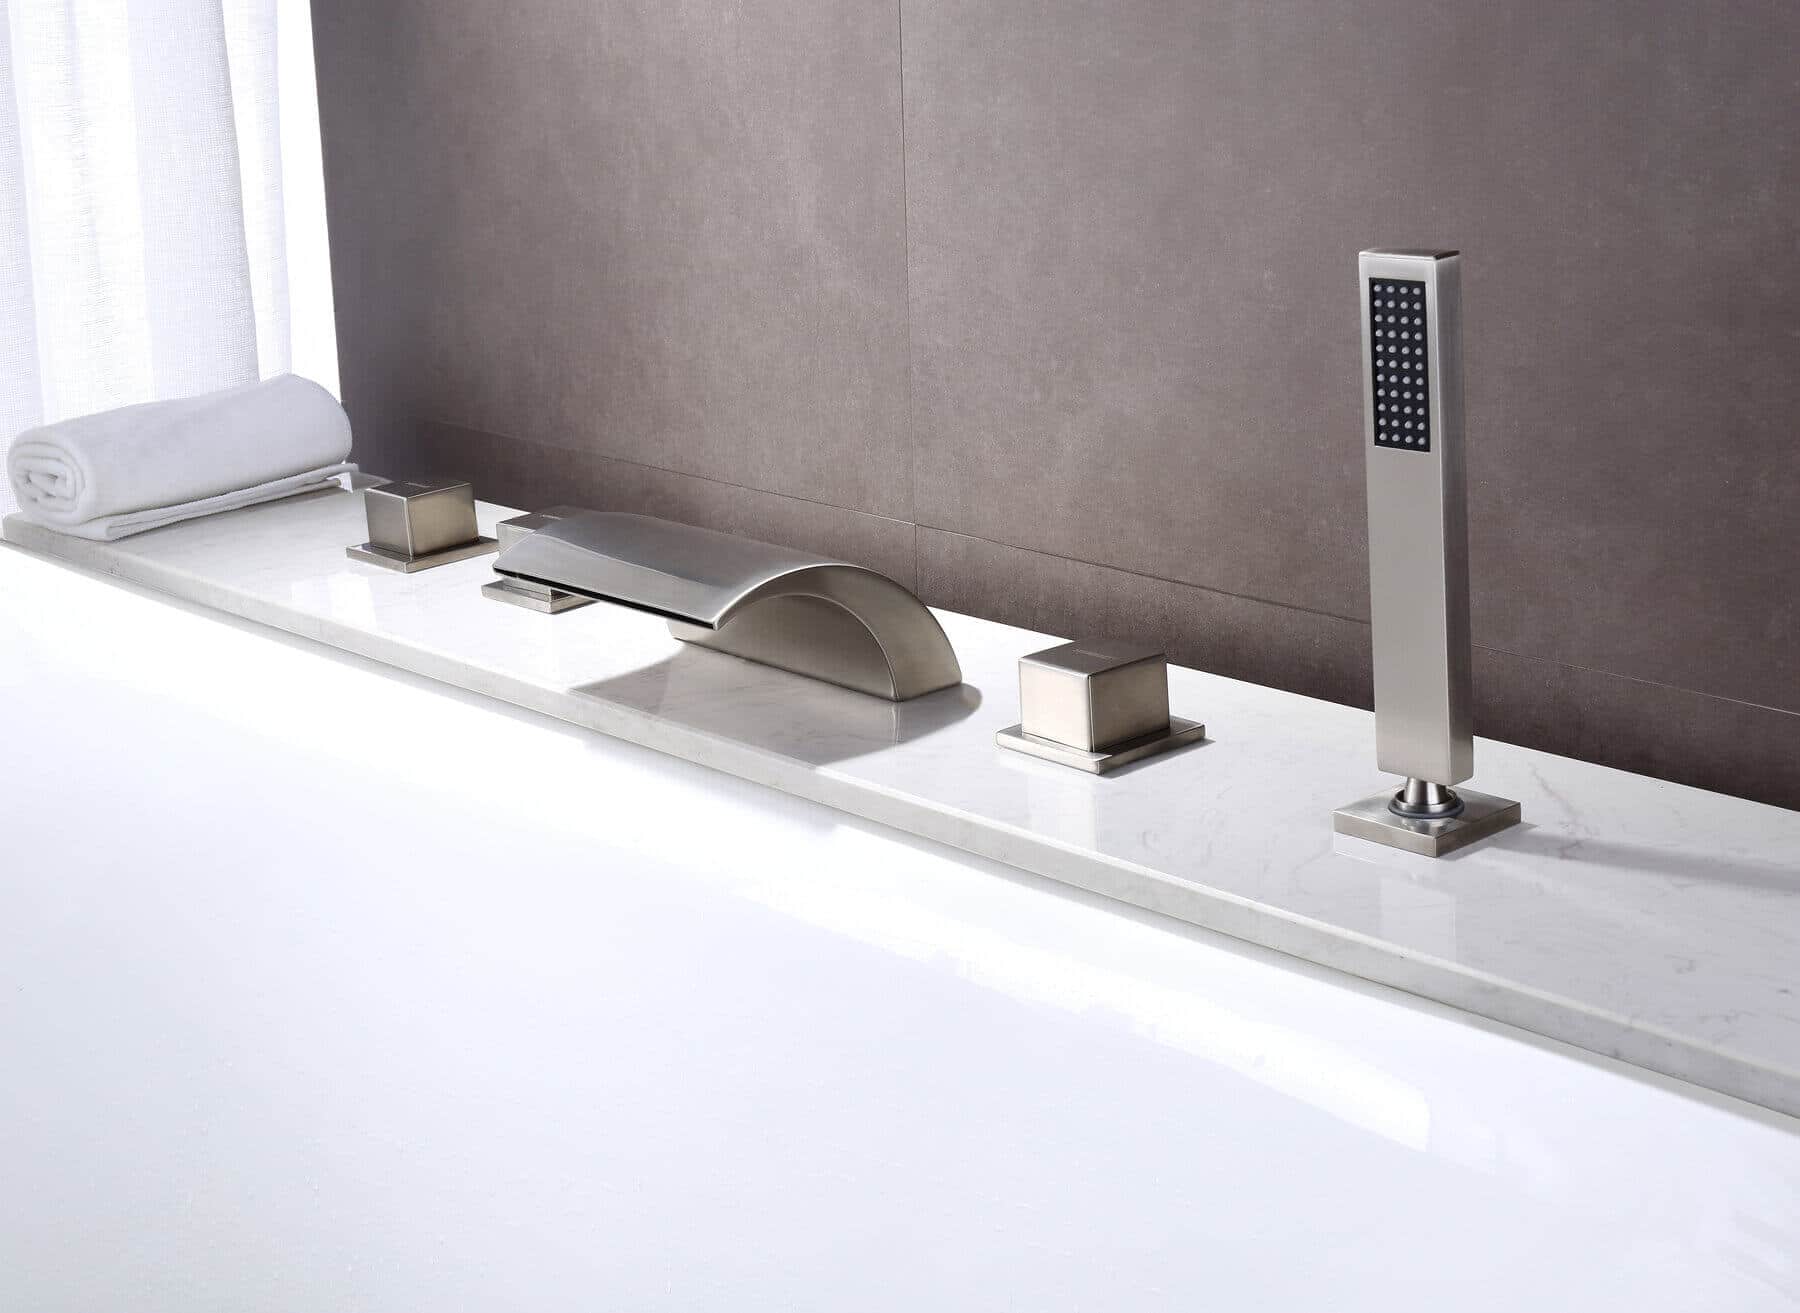
When choosing shower tub faucets it’s a good choice to purchase a tub faucet with solid brass construction, corrosion-resistant finish and comes with ceramic disc valves, this way you are guaranteed your faucet will last a very long time and you won’t have to waste your money replacing it every couple of years.

The other problem that bath renovators face is the overwhelming variety of choice, to solve this problem just keep in mind that you must match the style of the tub faucet along with the material and finish to the design sensibility of your bath décor.

Read more: Installing Under-Floor Electric Radiant Heat

What Type of Bathing Vessel do I Have?

This is the first question that needs to be answered to choose the correct bathtub faucets during your home renovation project. You need to realize first and foremost that tub faucet fittings are chosen according to the type of tub that you have.

Some people make the mistake of choosing the bathtub fixtures first and then go tub hunting, but it should be the other way around. Once you know the type of tub you have or intend to buy then it will easy to choose the tub fittings that are needed by narrowing down the options you have.

To begin your quest for the perfect tub faucet, you must know about bathtub trends and the types of bathtubs that are available on the market, these include soaking tubs, built-in bathtubs, freestanding bathtubs, and special bathtubs.

Read more: Framing a Built-in Cabinet for Your Bath

Homeowners that have soaking tubs will have one of the following models: Greek bathtubs or Roman tubs. Alcove tubs and drop-in bathtubs on the other hand fall under built-in bathtubs, whereas, freestanding bathtubs include claw-foot bathtubs and pedestal bathtubs.

Whirlpool tubs and walk-in bathtubs (or tubs with doors) are special tubs that are used for specific purposes. All the bathtubs that have been mentioned require special tub faucets to ensure that water flow is sufficient and that functionality is guaranteed when tub faucet parts are installed.

What Features and Functionality do I Want?

Tub faucets have evolved over the years, thus flooding the market with many great options to have the perfect groom space. The elegance, beauty and finish of some tub fittings can be a bit distracting if a shopper does not know what he or she is looking for. To start with some questions to ask yourself when you are selecting tub faucets include:

1. What special features should these tub fixtures have to attend to the needs of my family, visitors to my personal needs? Do I want my tub faucet to be installed on the bathroom wall, hanging from the tub itself or rising from the floor beside the tub?

2. How easy will it be to hire a professional to install these tub faucets and will there be high maintenance costs associated these bathtub fixtures?

3. Does my current tub have existing holes that can make it easy to install my new tub faucets and fixtures?

4. How practical and esthetically appealing will my present bathroom look when these my new tub faucets are installed? What features are present in my lavatory and how can I complement them with the styles and designs that are on these tub fittings.

Read more: Sound Proofing Your Bathroom

5. If I decide to change my bathtub a few years from now, will I need to get new bathtub faucets again or can they be used with my new choice?

How Much Am I Willing to Pay for my New Taps?

High quality tub faucets do not come cheap. This, however, does not mean that the higher the price the higher the quality. If you find that the price tag is way above what you are can pay now, then it is best to wait a while until you can afford it than to buy cheap tub faucets.

Cheap tub faucets may save you extra now, but leaking, lack of functionality and constant repairs can really drill a hole in your pockets.

Which Finish Should I Choose?

Tub faucets can be found in brass, stainless steel, or chrome. The type of faucet finish you choose will be based on what you are willing to pay and also the balance you wish to create with your other bathroom fittings and fixtures.

Read more: Designing a Safe Bath for Your Children

Copper and gold tub faucets are also popular faucet finishes that are used to create opulence and style in your bathroom but remember that not all finishes and accessories have to match precisely in your bathroom; the main thing to take away is that they should complement each other where tub faucets are concerned, after all your tub faucets should make your bathroom as pleasant to look at as it is to use.

Japanese Bathtubs: An Emerging Bath Trend

Transforming the Soaking Experience

When it comes to trends in bathroom tubs, for those “in the know”, Japanese bathtubs are starting to take the limelight. The oriental design and innovation that separate Eastern bathtubs from Western deep soaking tubs have contributed greatly to transforming the traditional soaking experience into a sumptuous lingering one.

This is because these Eastern bath tub styles are a lot more spacious and made from special wood to ensure that warmth is not lost to the surrounding bath environment. They are commonly referred to as Japanese Ofuro Bath Tubs and each perfectly captures the details of a traditional Asiatic basins.

Read more: Designing a Safe Bath for Your Children

a Japanese woman enjoys a bath in a wooden deep soaker tub

When one becomes immersed in any of the many Japanese receptacles that are available on the market, the whole experience is similar to a soaking spa. This trending factor is particularly one of the main reasons why Oriental washbasin designs have become an essential item for those that do not want a traditional soaking tub, but an Oriental soaking container which is much deeper to immerse your whole body.

These ancient soaker tubs for the bathroom allow the bather to whisk away all their stress while they listen to their favorite songs, read an interesting story, or just drift away in their heated bathing receptacle.

If you too want to experience what it feels like to lounge in a tub from Japan, then you will be pleasantly impressed with the many Asiatic styled basins that are available and how these handmade Japanese ofuros are making their way into Western bathroom décor. Some of the most exciting “made in Japan ” products to consider for your remodeling project include:

Read more: Designing a Safe Bath for Your Children

Immerse in a Takagi Bath Basins

Takagi bathtubs are extra-deep vessels that are perfect for washroom DIYers due to their lightweight structure and easy installation. They guarantee a chest-high immersion experience and are perfect for both small and large bathing areas given their space-saving dimensions. They do not use a lot of water and are the perfect washbasin for your bathroom if you want to keep the best of both worlds by dividing the space between a traditional soaking tub and a Zen bath.

These fixtures also have additional features to guarantee a thrilling bathing experience while your cares away. If you a picky shopper, then you will be able to find Takagi bathtubs with jets, timers, thermostats, and many other types of add-ons to have the perfect ofuro spa in your home.

In addition to these many great features, Takagi bathtubs are easy to clean and require very little maintenance. This is because they are made from fiberglass and as a result the surface of this Oriental style fixture is not a mold or soap scum magnet. These compact models cost far less than other stylish models on the market.

Saturate Your Senses With a Sakura Oriental Home Spa

The Sakura soaking tub is a luxurious home spa item that is crafted with a list of features that contribute to the hefty price tag it carries. These bathtubs are spacious enough to hold up to two people and come equipped with Aromatherapy Diffusion to help you relax. If you would like to add the medicinal sensations of color to your bathing experience then the chromatherapy feature will do just that.

Read more: Sound Proofing Your Bathroom

You can also choose the type of water flow you would like to provide the therapeutic touch in this luxury bath item. You can easily choose between pulsating, gentle, or an intense water flow based on your particular preferences. This is the perfect Japanese style bathtub for large bathrooms given their large dimensions.

Wash Your Cares Away in The Ofulo Japanese Bathing Vessel

The Ofulo soaking tub can be found in different models that have specific peculiarities that distinguish them from each other. The most common ones of the market are the Ofulo 1, Ofulo 3 and Ofulo 5 Japanese bathtubs. All three fixtures are made from fiber glass which prevents these manufactured goods from gathering mold and other material build up on them.

The Ofulo 3 and 5 are designed as the traditional American baths, but these Asian styled vessels have an added distinction due to the extra depth that they have. The Ofulo 1 is an Oriental soaking tub that is similar to the Takagi Japanese bathtubs mentioned earlier based on their design, compact structure, and depth.

Read more: Designing a Safe Bath for Your Children

If you want to enjoy a relaxing bath after a very long day at work of just unwind in an inviting spa setting, then lounging in a Japanese styled tub is what you may need. While these Eastern influenced basins may not be the ideal option to “get clean” so to speak, they are nonetheless the best when a therapeutic home remedy is needed to unload stress in a relaxing receptacle that is large enough to guarantee the perfect immersion experience.

Installing Under-Floor Electric Radiant Heat

Keeping Your Bath Warm and Toasty

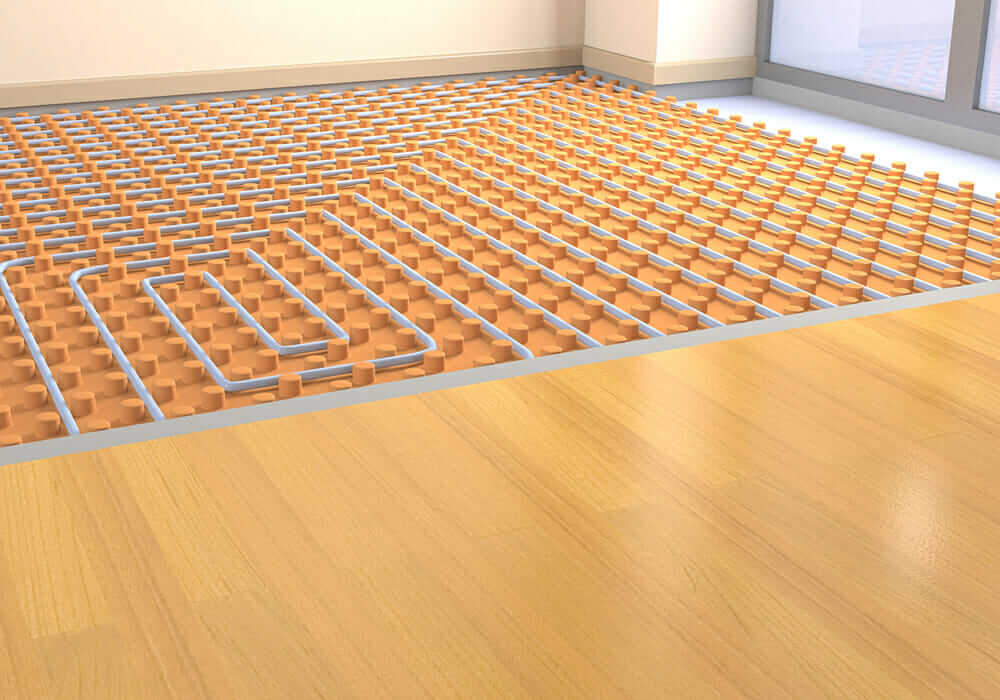
Electric radiant heat can be installed under brick, ceramic, porcelain or stone tile in your bathroom and is usually put in directly over the floor substrate whether it is plywood or concrete.

The way it all works is a power cable provides electricity to the heating elements then a sensor bulb relays the temperature back to the thermostat.

One effective radiant heating system consists of a plastic mat with heater cables interwoven between the mats interlaced surface. After the heat elements, power cable, sensor bulb, and sensor wire are in place, the mat is fixed in position by embedding it in a thin layer of thin-set before the floor surface material is placed over it.

Read more: The Ultra Contemporary Trend of Wall Hung Fixtures

You can then control the temperature through a wall-mounted thermostat or timer that allows you to heat your floors at a pre-set time and temperature.

Needless to say, turn off the power to your bathroom before attempting to do any electrical work. It would be best to install a large capacity box for the thermostat about eye level off the floor.

Just make sure the 120-v circuit meets with GFCIstandards and is well protected. You should note here that the wattage you will need will also increase with the larger size ofyour bathroom, so check the manufactures specifications to make sure your wattage is adequate for the size of the mat you purchased.

Also, note that you should never overlap mats. And it is a definite no, no, to cut a mat to fit your room. If for any reason your mat is damaged such as a cut or nicked heating wire, never under any circumstance try to repair it yourself unless you want the mat shorting out or causing a fire. The whole mat must be replaced unconditionally.

Read more: How to Use Invigorating Scents in Your Bathroom

Estimated Time and Tools for Completion

The estimated time the whole project should take is approximately about eight or nine hours to install the mat, wiring and surface tile in the average homeowner’s bathroom. This does not including prepping the area by roughing in the plumbing or possibly installing the subfloor.

The skill set you will need includes: setting tile, installing electrical boxes, connecting wires to terminals, which will probably involve splicing and stripping wires.

The tools you will need for this bathroom renovation project are but not limited too: tools for laying the flooring, drywall saw, stripper, lineman’s pliers, screwdriver, drill, half-inch bit, and a digital ohmmeter.

Fish tape, a hot-glue gun (to bond power cable to the substrate) and a three-eight inch trowel will also come in handy. Of course, you will need the radiant heat mat, armored power cable, box, 12/2 cable power source, and a timer or thermostat.

Read more: Designing a Safe Bath for Your Children

For the floor you will need surface flooring material, thinset to hold it all down and mortar or grout to fill in the gaps between the tiles.

The key to how well your floors perform is how well the surface flooring material conducts the heat.

The best materials for this are ceramic tile and stone. Solid materials such as laminate are much better conductors compared to a material such as carpets which provides way too much insulation.

Vinyl can also be used but you have to keep an eye on your temperature with this textile. And don’t forget to carefully plan your wiring, place the thermostat as close as possible to the power source because this will increase the efficiency of the electrical radiant heating system in your bathroom and allow you to reap the benefits of your radiant success.

Read more: Sound Proofing Your Bathroom

Framing a Built-in Cabinet for Your Bath

Who Doesn’t Want More Cupboard Space

Framing a built-in cabinet will give you more storage in your bath. Most bathroom wall space is underutilized and can be better exploited through the addition of built-in custom cabinetry. When framing a built-in cabinet for your washroom you must first decide upon the size of the cabinet.

Typically wall studs are about 16 inches apart on the center of a 2×4 so to create a built-in cabinet or recessed storage cubby, a fourteen and a half inch space is needed to accommodate the cabinet if you do not want to cut through your existing wall studs.

Believe it or not this is actually a lot of storage space if used correctly. In this space you can put some recessed display cabinets, a drop down ironing board or your typical medicine cabinet.

Read more: The Ultra Contemporary Trend of Wall Hung Fixtures

Reclaiming the Area Between Your Existing Structural Joists

When renovating your bathroom, the process of framing a built-in cabinet is straightforward and most standard medicine cabinets will fit quite nicely between your existing wall framing studs.

In preparation of installing your built in cabinet you first need to locate your lavatory wall studs with a stud finder and using a tape measure determine the size of opening you will need to cut in your drywall.

Know What’s in Your Walls Before you Begin Construction

And for safety’s sake, before you forget, make sure you turn off all utilities going to your washroom because you never know what you will find within your bath walls in terms of wiring and piping.

One thing that should be mentioned is that it is usually best to put your bathroom cabinets on your interior walls as opposed to your exterior walls. This is fundamentally better for your storage solutions because while you may gain storage space, you will ultimately lose the all-important insulation in your exterior bath walls.

Before you begin framing the space for your new cabinet between your wall studs, you need to use a framing square and level to lay out the cut lines for the opening on the wall where your built-in cabinet will be inserted.

Read more: How to Use Invigorating Scents in Your Bathroom

Creating the Framework for Your New Storage Compartments

To make cutting the drywall easier and more accurate start by drilling holes at the corner of your layout to get you started with the cut. Using a drywall saw continue cutting along your schematic lines until you have successfully made an opening.

Next, behind the drywall on the wall studs you need to create a stable support for your cabinet. Using four drywall screws per block, this can be accomplished by fastening six-inch 2×4 blocks to the inside of the wall studs at the top and bottom of the cabinet opening.

Blocking in the Cabinet Opening

Just make sure you leave enough room when spacing the blocks to accommodate the header (top) and footer (sill) 2×4 extension pieces at the bottom and top of the cabinet opening. Now you must attach the header and sill at the inside top and bottom of the six inch long blocks.

Using a hammer drive nails into one toe-nailed fastener into your wall stud and drive the other nail into the support block for added stability. Now all that is left is to position you new cabinet between the framing members and install with one and three-quarter inch wood screws to finish your built in cabinet installation.

Read more: Designing a Safe Bath for Your Children

Compensating for Deeper Shelving Units

One thing that should be mentioned here is that most wall studs are going to be four inches deep so if you have a deeper cabinet it will protrude from the wall. To fix this problem you are going to have to use extension pieces to bridge the space between the cabinet front and your bathroom wall. This can be easily done by predrilling and attaching the pieces to your bathroom wall or new cabinet.

Framing and installing a standard built-in cabinet is a quick and simple DIY weekend project to help you organize your bath. If on the other hand, you want to frame a wide cabinet, this would involve more time and planning because you would have to cut away studs and framing members.

And if the wall you are cutting into is a load bearing wall this would also involve creating extra support for the framing members to redistribute the load. The good thing is that for walls that are not load bearing, a single 2×4 header should suffice for an opening up to three feet wide.

Read more: Sound Proofing Your Bathroom

Sound Proofing Your Bathroom

Hey did you hear that…..If you didn’t, listen real close, how about putting your ear to the wall to see if that helps. Still nothing? Good. One of the most over looked attributes about your bathroom is sound control.

Its probably not the first thing that comes to mind when designing a bathroom but if your bathroom is a high traffic area or people work at different times of the day, then the times that people use your bathroom could possibly become an issue.

So how do you keep the noises within your bathroom from drifting into other parts of your home? One way to counter the problem is through sound proofing. The other is by the choice of fixtures you purchase.

First look at the design and construction of your bathroom walls. If you are starting from scratch or are willing to gut your bathroom walls exposing the framework then the most effective and possibly the most expensive technique to sound proof your walls is to build a false wall inside the original wall.

Read more: How to Use Invigorating Scents in Your Bathroom

This can be done by staggering the studs, allowing you to weave blanket insulation between them. Another procedure is to attach sound insulation board or even metal insulating channels to the wall studs before you put the wall boards in place.

This method is less effective but is a little easier to apply. Some people simply install standard insulation in between the stud cavities, while this does provide minimal sound proofing, however with this method bathroom sounds still have a tendency of carrying on through the studs themselves.

Believe it or not the layout of your bathroom also plays an important role in controlling sound. Don’t place your bathroom door directly across from other bedroom doors and situate cabinets and built in closets to buffer noises from your bathroom and make sure they are well sealed with doors to reduce echoing.

Read more: The Ultra Contemporary Trend of Wall Hung Fixtures

Sealing Nooks and Crannies

Other places that should be sealed include around electrical outlets and cracks in the floor or walls, around tubs and shower enclosures, recessed medicine cabinets and hanging light fixtures.

Consider purchasing a full shower enclosure instead of an open model. Basically anywhere sound can escape should be sealed with caulk or insulation. You may even think about installing a door stop to close the door quietly and keep sound from leaking out.

Wrap water pipes with insulation and make sure they are strapped in securely to diminish noise. And don’t forget the heating ducts; install fiberglass insulation along the first couple of feet to help absorb any noise coming from the bathroom before it gets too far.

Read more: Grout Cleaning Hacks

Last but certainly not least is the choice of fixtures that you purchase for your bathroom. Today’s toilets not only conserve water but they also reduce the sound of your flushing as well.

What’s more is that you can buy shower heads and vanity faucets that conserve water as well as have adjustable flows to reduce water noise and usage.

From whirlpools to jetted tubs, energy efficient and water conservation is the name of the game in today’s bathroom appliances and fixtures, buy new and you will be able to reap the benefits of the latest technology for a quieter more eco friendly bathroom.

And don’t forget that soundproofing your bathroom not only keeps noise from getting out, it also keeps noise from getting in for a more enjoyable soak in your tub.

Read more: How to replace or repair caulk from shower

Designing a Safe Bath for Your Children

Avoiding Unnecessary Injury

Children’s bathrooms should be designed based upon durability, safety and comfort. When designing your washroom for younger children keep in mind what physical limitations affect the child’s mobility and perception of what the room is really for.

You must also remember that your child will grow up and the design features you install into the bathroom must be able to be easily removed when the child gets older and no longer needs them.

By taking into consideration the age and what the child can and cannot do for him or herself, will give you guidelines for a safe convenient bath ing space .

These limitations will affect the amount of floor space, the distance between fixtures, height and depth of shelves and countertops, location of storage, placement of safety grab bars (optional), and other bath features.

Read more: How to Use Invigorating Scents in Your Bathroom

Open a dialogue with your children and find out what their problems are and what they enjoy about using your present family lavatory.

If you are not renovating the bathroom yourself, a contractor may be more open to your ideas if they know before hand who will be using the bathroom, especially if you have worked out a plan with measurements, fixture sources and accessories based upon your child’s needs.

Take into consideration that children experience difficulties because of their shorter height and less firm grasp which all affect bathroom safety.

It’s pretty much a given that children love water games so everything must be waterproof and must have water resistant finishes; rugs on the floor is not an option. For durability, ceramic tiles on the walls and floors will be able to withstand the blitz of dirty hands, crayons and plenty of water sports.

Read more: The Ultra Contemporary Trend of Wall Hung Fixtures

Getting a Grip on What Really Matters

Remember that the floor should be covered in a non-slip material such as studded rubber or cushioned vinyl. Scrubable paint and strippable vinyl wallpaper will also help with the cleaning up and replacement process if your child is extremely adventurous and creative.

Keep floor cabinets secure with child locks or latches to avoid your child indivertibly swallowing poisonous chemicals or getting unpleasant rashes from contacting skin irritants. Do not put coat racks or any free standing mirrors in the bathroom since these can be easily toppled by an unsupervised curious child.

Avoid purchasing products that are contained in glass, it would be an unpleasant surprise to you and your child if he or she is cut by some thing they have spilt or broken. Again, it cannot be emphasized enough that any medications, household cleaners and things with sharp corners should be kept out of the reach of small children.

All electrical outlets should be made inconspicuous and covered with plastic covers and make sure the bathroom door can be unlocked from the outside in case the child accidentally locks him or herself in. A lever handle as opposed to a round one would even be a better idea; it makes opening doors a lot easier in case the child’s small hands are wet or slippery.

Read more: Grout Cleaning Hacks

If your child is still an infant, ample counter space for the baby’s bathtub and a sturdy changing table or area is, without doubt, a necessity. Also, a flexible hose, attached to the faucet to fill the baby’s bath or to aid in washing the infant would also be an asset in the child’s bathroom.

Try to make the counter about waist height to reduce stain on your back and keep the whole experience as comfortable and enjoyable as possible. Ample lighting is also a necessity not only for you but also for the child who is sometimes afraid of dingy under-lit places.

Individual differences will affect the designing of the child’s bathroom, which is why it is important how the child or children will be using the facilities. Keep these principles in mind and you and your child should find using your bathroom a pleasant learning experience.

And just as an afterthought, pets are like children, following the same rules will keep your pets safe in your bathroom as well.

Read more: How to replace or repair caulk from shower

How to Use Invigorating Scents in Your Bathroom to Wake up Feeling Energized and Refreshed!

Start Off Your Day With a Smile

Do you find it hard putting one foot in front of the other in the morning? Do you dread the sound of your alarm going off as you drag yourself dreary eyed and grumpy out of bed? Do you need the infusion of 10 cups of coffee just to jump start your day?

How would you like to wake up feeling good and refreshed and ready to face the world with a smile on your face? Well, come a little closer my sleep starved friend and I’ll let you in on a little secret: adding grapefruit, cucumber or mint to your bath or shower can be a very cool and refreshing way to wake up in the morning.

Read more: Unclogging Drains in Your Bathroom

The bathtub is not just for relaxing at the end of a stressful week, it’s also a great way to get a head start on your day! Citrus scents such as grapefruit, lime and mandarin infuse your bath or shower with uplifting scents that are just as effective at waking you up as a cup of strong coffee.

Lemon is also associated with cleanliness and has invigorating properties. Grapefruit is an ideal staple item if you were partying the night before. Just a little grapefruit oil (4-6 drops) added to your bath water eliminates toxins from the body and is an excellent way to get you going on a sluggish morning.

The citrus oil is essentially squeezed from the grapefruit peel and the tangy invigorating smell is great for brightening your mood and is thought to have antidepressant properties. In addition to the grapefruit, adding 3 drops of basil to your bath is also a good way to stimulate the brain.

Read more: How to solder copper pipe with water in it

Put Some Pep in Your Step

There are many bath products such as gels and soaps like Irish Spring that contain the zippy aroma or mint and are sure to invigorate your senses early in the morning. If you are using essential oils, never add more than 3 drops of peppermint oil in a bath since if it is use in concentrated form, it can irritate sensitive skin.

The juice from a cucumber splashed over your body as you stand in the shower or bath has a cooling effect leaving you feeling cool and refreshed.

Read more: How to replace or repair caulk from shower

These scents revitalize the senses and uplift your mood. You can vaporize the essential oils in the bathroom using a vaporizer. You can buy commercial products loaded with citrus oils (grapefruit, lemon, lime or mandarin), cucumber or mint in the form of soaps or gels.

Or your can add drops of these essential oils to your warm bath water. Either way these stimulating scents offer you an inspiring alternative way to wake up feeling energized and fresh without the caffeine rush.

Read more: DIY Grout Cleaners [Grout Cleaning Hacks]

[Wall Mounted Bathroom Fixtures] The Ultra Contemporary Trend of Wall Hung Fixtures

Create Clean Design Lines With Floating Fixtures

When it comes to recent bathroom trends that have caught on like wildfire, wall hung toilets, wall hung sinks and wall hung vanity cabinets come to mind. There are many benefits to having these fixtures hung from your bathroom wall, the most obvious is they take up less space and make a smaller sized bathroom look a lot roomier.

The other appeal of the wall hung phenomena is that they can be installed at what ever height is most convenient for you or your smaller family members, a convenience benefit which any bathroom user would surely appreciate.

Read more: Unclogging Drains in Your Bathroom

On the other hand if you are looking for something modern and trendy, which updates your tired old bathroom with new appeal and style, then the contemporary look of wall hung sinks, toilets and vanities is the way to go.

The benefits of these wall hung masterpieces far outweigh the cons. The most obvious disparity is the clearly visible plumbing fittings beneath wall hung sinks which is not really an issue if you don’t mind.

There are however a couple things you can do to rectify this minor inconvenience. In some design circles, bathroom designers have simply treated the plumbing as just another design element and some have even highlighted it with stylish fittings or incorporate pipe covers into the design.

Read more: How to solder copper pipe with water in it

Another way to mask the problem is through the use of decorative shields as used by some pedestal sinks. If you have the room, you can simply purchase an oversized wall hung sink where the deep walls of the sink effectively obscure the plumbing, leaving only visually clean lines.

Adjusting Your Sink and Toilet to a Comfortable Height

And don’t forget if you do purchase a wall hung vanity/sink combination then you’ll never see the plumbing anyway. Problem solved. The only stipulation of wall-hung fixtures is that since they are not supported by your bathroom floor, they need a steel support frame that must either be hidden within the furniture unit or incorporated into your bathroom wall.

Read more: How to replace or repair caulk from shower

Wall hung toilets are self contained which makes them easy to clean inside and out. And since wall hung bathroom fixtures make excellent use of functional space just by virtue of being attached to your bathroom wall, clean up around these stylish looking fixtures is a breeze.

And the plus side to this is that you can adjust your toilet, vanity or sink to any comfortable height. Most wall hung toilets offer the extra comfort of an elongated toilet bowls which by virtue are much more comfortable than their round counter parts.

And we have not forgotten about you baby boomers out there, as this aging portion of our populace is getting older, having a wall hung sink or toilet is perfect for elderly persons because it provides easier access for wheelchairs and walkers.

Read more: DIY Grout Cleaners [Grout Cleaning Hacks]

DIY Grout Cleaners [Grout Cleaning Hacks]

A Homemade Solution to Freshen up Your Tile

Homemade grout cleaners are quite popular among homeowners that are looking for a practical green solution to leave their tiles sparking clean without the sometimes damaging effects of harsh commercial chemicals. What many ordinary people have found is that they do not need to spend undue amounts on commercial grout cleaners that usually have harsh ingredients that are not safe for the environment or their families.

In addition to this, while performing grout maintenance, they can use very common household products that they already use on a daily basis to make homemade DIY grout cleaners that are just as effective to remove dirt from between tile lines. If you are looking for a home remedy for cleaning your tiles and grout lines, this dispenses the need to buy specialty grout cleaning products when you can simply use easily accessible household ingredients to make this possible.

The types of do-it-yourself grout cleaners that should be used will depend on the extent of the dirt or mildew build-up on your tiles and also how frequently you have performed grout and tile repair in your bathroom. Read on as we present to you a list of grout cleaning methods that can be used to remove dirt from grout by mixing homemade grout cleaners that are easy to make and also inexpensive as well for grout restoration.

Using Lime Juice to Clean Grout

Lime juice can be used as a natural grout cleaner. Limes are acidic and this makes it easy for them to remove dirt from bathroom grout lines. This type of homemade grout cleaner is not very effective to remove mildew, but it does work effectively on grout lines that have some degree of dirt in between them. The processes involved to use limes as a home remedy for cleaning tile grout are as follows:

– Cut a lime and squeeze the juice in a small bowl.

– Use a strainer to remove the small pulp that is left behind after squeezing the limes.

– Evenly disperse the lime juice on the bathroom floor area that you want to remove the dirt and grime from your ceramic tile grout lines.

– For vertical walls, when using lime as a grout cleaner, you can use some paper to soak up the lime juice and then leave then paper on the wall area you are trying to clean. When done, rinse with water.

Read more: Unclogging Drains in Your Bathroom

Creating A Scouring Paste Without the Abrasion

Salt, baking soda and water are quite good as a grout cleaner if you are trying to make an abrasive type of paste for cleaning dirty grout. The amount of paste that you will use will depend on the area that you have to cover. The steps involved in making a homemade grout cleaner with these readily available ingredients include:

-To begin making this grout cleaner, cut some limes and squeeze the juice in a bowl

-Place some baking soda in the bowl along with some salt

-Mix them to form a thick paste and then use this along with a sponge or small cloth to gently scrub the area you need to clean the dirt from your tile grout. Rinse with water.

Read more: How to solder copper pipe with water in it

Chlorine and Water for Cleaning Grout

If you find that you are having problems with mildew in your grout lines then instead of using the homemade grout cleaners mentioned above, you can easily dilute chlorine bleach and water as an effective solution for cleaning your grout lines. Just be aware that chlorine has a very strong smell and as such you will need to ensure that your bathroom is properly ventilated before using this cleaner.

Also, you should be aware of color grout fundamentals because you don’t want to discolor your tiles or grout. Some homeowners like to mix chlorine with other grout cleaners but this is not advisable because you don’t want to accidentally create a toxic mixture that may be potentially combustible.

You will have to take care to not use a very concentrated solution since this can potentially discolor your tiles and the grout as well. The steps involved in making this type of grout cleaner include:

-Put 2 teaspoons of bleach into 2 cups of water

-Pour the chlorine/water solution between the tile lines and let it sit for a moment before you begin to remove the dirt from your tile

-Scrub the grout lines with a small brush if necessary and repeat the process until your grout lines in the tile are clean. Rinse with water.

Combining Commercial Cleansers With Everyday Products

Ammonia is present in a variety of grout cleaners. This is a very effective yet unpleasant smelling grout cleaning product that is easy to find in stores and home centers. The steps involved in using ammonia for homemade grout cleaners include:

-Mix the baking soda and ammonia in a small plastic bowl to form a thick paste

-Use a plastic knife to put the paste on the tile area that you would like to clean

-Scrub the area with a small soft brush to clean the grout

-Rinse with water and repeat the process if necessary to ensure that the grout is now clean

Read more: Troubleshooting Toilet Flush Problems 101

Vinegar for Tile and Grout Cleaning

Vinegar is an acid base substance that is generally used in salads. This product is a lot cheaper than grout cleaners and is also easy to find in supermarkets as well. The steps involved in using vinegar as a tile grout cleaning solution are.

-Dilute the vinegar in water. For every part of vinegar you can add two parts of water.

-Spread the mixture on the tile areas you would like to clean and use a small brush to gently scrub the grout lines using small circles.

Because most of the homemade grout cleaners used for grout restoration do not have the harsh chemicals that commercial grout cleaners have, they will either have to soak on your grout lines for a little bit or you may have to use a little more elbow grease to get the job done but if using green products is important to you then a little bit of effort is well worth the price of having your grout lines sparkle like new again.

Read more: The Crazy Things That Get Stuck in Your Toilet 

Hopefully, now that you are aware of these tile maintenance alternatives, you will be able to avoid the tile restoration errors that some first-time bath renovators make.

How to replace or repair caulk from shower

Knowing When to Replace or Repair

No matter how good the caulk between your shower tile and bathtub may look today there will come a point when it becomes infested with mildew, drenched with water, or having a cracking appearance. When this happens, it does not matter how much bleach or special chemicals you use in certain areas in your shower tile it will be hard to get the original look.

This is because the damage to the old sealing material in the shower tile may have moved to areas behind the tile itself and along the bath tub or other specific areas. The faster you deal with this, the less expenses and time you will have when removing the old sealant from your bathroom shower tile.

Read more: The Crazy Things That Get Stuck in Your Toilet 

Locate the Damaged Sealant

If you are a first time DIYer, then you may be wondering what exactly is caulk and how may I differentiate it from the grout in my shower tile? Caulking is usually placed in areas that have movements or water exposure. These areas usually include the meeting point between your bath tub and shower tile, floor and wall tile/ shower tile or the inside corner where two shower walls meet together.

This sealing material can also be found around plumbing faucets and valves. Grout on the other hand is used to fill the space between bathroom shower tiles and other tiles. In short, it is the finishing touch after you laid tile in your bathroom shower, walls, and floors.

Determine the Type of Waterproof Filler Used

The main types of watertight coatings that are used in bathrooms are silicone sealant and latex/acrylic latex caulk. Both types require different removal procedures, so knowing which sealer was used between your shower tile and bathtub or any other bathroom area for that matter will make the removal process a lot easier. You will also need to use the same type of caulking that you used after your shower tiling.

Read more: Troubleshooting Toilet Flush Problems 101

Remove the old Sealing Material

As mentioned earlier the removal process for different types of sealant will vary. The water based latex caulk/acrylic latex caulk requires heat to be removed and you can easily achieve this by using a heat gun to soften the caulk that is located between your shower tile and tub or any other area. You should take care not to apply too much as this can burn the sealant and even crack the shower tile in the process.

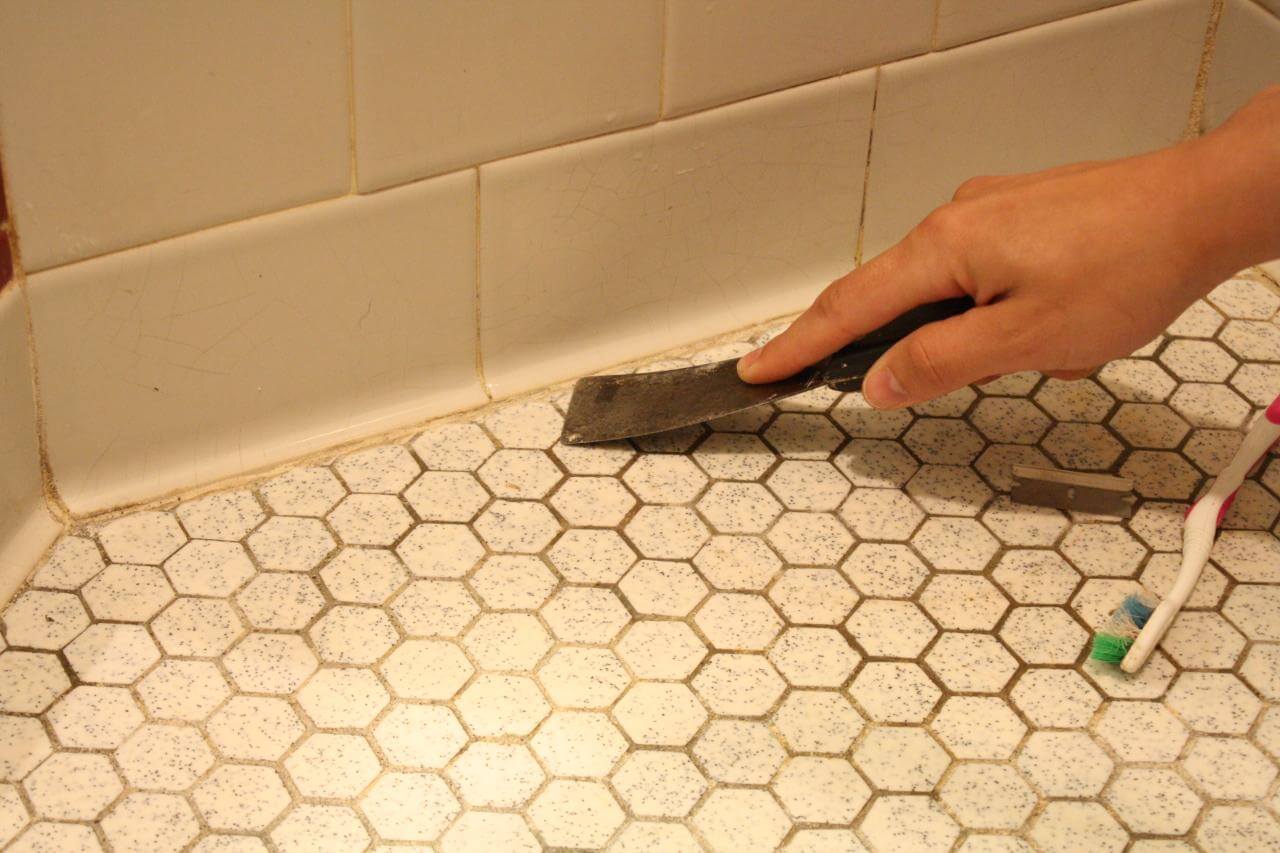
Silicone caulk on the other hand can be removed by using the blunt end of a knife to dig if out. If you find that this is not working then you may try a sharper knife or razor taking care not to scratch the surface between the shower tile and tub or other affected areas.

Recapturing Your Tiles Original Lustre

Grout restoration is a task that most first time bath renovators’ dread. The unsightly appearance of cracking grout or mortar that is full of dirt and mildew can cause any homeowner to stare in despair and disbelief. Luckily, depending on the problem you are facing with your bath there are a number of refurbishment recommendations that you can be used to make it sparkling new again.

In many instances, these methods only require proper cleaning to capture the original appearance of your grout. In other instances, you will have to use repair techniques by removing old mortar and replacing it with new grout and sealant once more. While most homeowners dread the thought of the work involved that requires replacing grout, in many cases, it is the best solution for unsightly tiles. Below you will find a list of techniques that you can apply in your bath to make it beautiful and clean again.

Read more: Unclogging Drains in Your Bathroom

Clean the Mortar

The first thing that should be done when you are considering grout restoration is cleaning your tile floors or walls. By cleaning the mortar lines with specially made solutions you will be able to evaluate the extent to which your grout can be repaired without resorting to removing it altogether. You may use acid-based cleaners, oxygen bleach, or even hydrogen peroxide in cleaning grout.

These are very strong chemicals, so always remember to protect your hands by using gloves. Once you have applied these chemicals then allow a few hours to pass before you arrive at a conclusion about the result. You may try reapplying the chemical you used once again to see if the stain, mildew or dirt is lessened or removed.

Coloring the Compound

If you find that the grout is not cracked, but discolored then you may want to try coloring the mortar by first learning about these color grout fundamentals. Coloring the grout is an easy process that involves using colorant in areas where the grout has been applied.

However, you will need to determine the type of grout that you have before you consider using this method. If you have unsanded grout then the best advice will be to remove it altogether. However, if you find you have sanded grout then you can easily use a grout colorant as was mentioned earlier.

Try to select a colorant that will complement the original look of your bathroom or create a new personalized look that you are satisfied with. You can try using the colorant on a small area to see how it blends with the tiles and faucets that are already in the bathroom.

Read more: How to solder copper pipe with water in it

Another useful tip to bear in mind when considering staining techniques would be to use masking tape along the end of each tile. This will prevent you from discoloring the tile in the process and make it a lot easier to color along the line of the joints. Always ensure that the surfaces you are coloring is clean and also intact. Broken and old mortar should be removed and not colored.