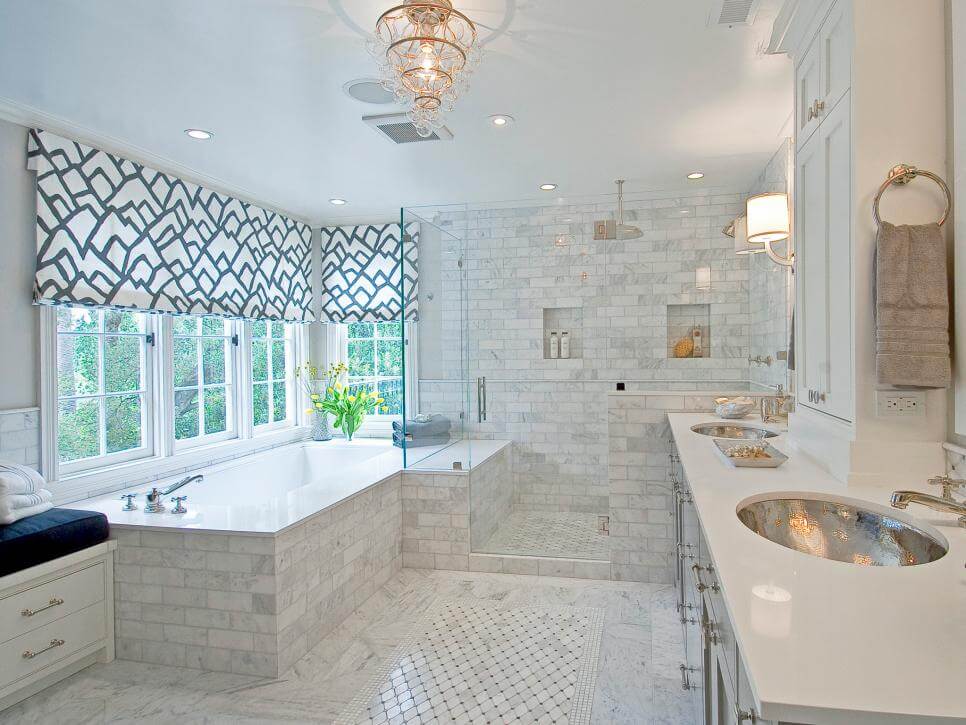
Luxury Bathroom Remodel [Five Mistakes to Avoid When Remodeling Your New Luxurious Bathroom]

Dodging the Renovation Bullet

You are finally able to do that remodeling in your bathing space. You have been making plans and purchasing things here and there. Don’t let your bathroom remodeling project turn into a lavatory nightmare. Avoiding these five common home remodeling mistakes can ensure that your bath renovation project is a sweet success!

Improper Ventilation

Mistake #1 – Many times people will not think to install the proper ventilation. This mistake will cause condensation from the showers and baths to stay in the room. This will make it moist and wet. When this happens, mold will be an unwanted visitor in your bathroom!

When you are making your bathroom design plan, be sure to include a vent that will expel out all that condensation. Your bathroom should also include a bathroom exhaust fan.

Read more: How to Remove Shower Head that is glued on without Scratching

Crazy Color Combinations

Mistake #2 – You may be tempted to choose colors that are “in style” for permanent fixtures. This mistake may have you wondering what was going through your mind a few years from now.

The things that are “in style” now will likely be out of style within a few years, and your permanent fixtures will still be around, “in style” or not! It is recommended to use neutral colors for your permanent fixtures. Leave the trendy designs for your towels and decorations.

Read more: 3 Popular Types of Bathroom Shower Faucets Examined

Not Waterproofing Everything

Mistake #3 – Many times, people are not familiar with bathroom tiles and they will not realize they should buy waterproof adhesive. They just assume that the fitted tiles are waterproof enough.

However, this could be a costly mistake because you will likely have to replace the tile down the line. Water and condensation can pass through the cracks and damage non-waterproof adhesive. The adhesive will eventually deteriorate and the tiles will crack and fall off the walls. This costly mistake can be avoided by simply purchasing a waterproof adhesive!

Poor Layout Choices

Mistake #4 – Not giving yourself enough space for your door is a big mistake for such a small room! Before you install your door, make sure your door will have enough room to swing fully. It seems the door is one of the last things people will install.

Unfortunately, if you do not allow enough room for your door to swing, it will likely smack up against the vanity sink or toilet. Also, if your bathroom is small, it is a good idea to have your door swing outwards.

Read more: How to Convert Single Bathroom Sink to Double Sink

Not Planning for Accessibility

Mistake #5 – Making your water pipes hard to get to is a common mistake that can cost you a lot of money to fix. This one is important, as it is a costly fix that you likely did not include in your bathroom budget and can destroy all that you have created.

If you discover water pouring from the walls once you have everything put back together, you will likely need the services of a plumber. Your plumber will have to destroy your new tiling to get to your leaking pipes. Fortunately, it is completely preventable if you consider your plumbing access before you get started on your bathroom renovation project.

If you avoid these common mistakes, your bathroom remodeling project will be a success, and you will be able to enjoy that luxurious bathroom you have created.

Read more: Cost-effective window treatment ideas

Cost-effective window treatment ideas for large, glass, modern and hard windows
Add Charm or Drama to Your Lighting

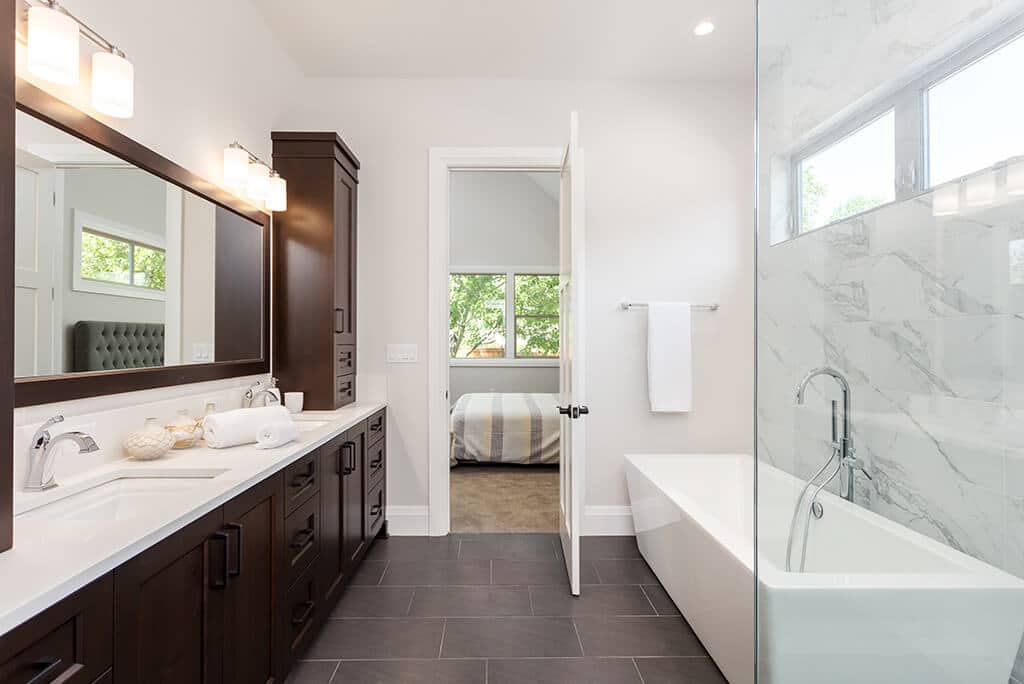
Well treated windows can add charm or drama to any bathroom. Windows not only offer you a beautiful scenic view, they also let in warm sunlight and open up the space of a small bathroom to help it look more expansive.

The only stipulation is that the window treatments should complement the overall bathroom décor. The main elements of a bathroom window treatment are the location and size of the window along with the style and shape of the window frame and glass.

And of course don’t forget about the window coverings whether they are curtains or blinds, they should all be included in the planning stage of your bathroom layout.

Read more: 3 Popular Types of Bathroom Shower Faucets Examined

Is Privacy an Issue?

When privacy is not a problem, use clear glass to let in as much light as possible. The alternative is to use a frosted glass with plenty of translucence.

Another novel solution is to use one way glass (sometimes called mirrored glass) that allows you to see out but blocks people passing by from peeking in on you as a result of having a coating of reflective material on the outside of the glass. Still there is tinted glass, this offers some privacy and also is good for bathrooms in strong direct sunlight most of the day.

Stained Glass Windows

If you really want to get creative then install a custom made stained glass window or if that would be too expensive then you can always just hang a stained glass framework made from transparent glass like material in front of your glass window to get the same effect. You can even continue the design on your shower doors to make sure everything matches.

Read more: Installing a Toilet in Your Basement or Spare Room Without a Standard Plumbing Drain

Creating a Modern Feel

Shutters, blinds and curtains are your typical window treatments. Wood and metal blinds add a modern feel to your bathroom and should be sealed or painted with a water resistant coating to defend against moisture damage such as warping or rusting.

Curtains add a more romantic feel to your bathroom. Just remember to make sure that your bathroom is heated and well ventilated to help the fabrics withstand the humidity in your bathroom.

Read more: How to Convert Single Bathroom Sink to Double Sink

Bathroom Fixtures That Will Improve Your Life!

The bathroom is one of the most important rooms in a home. It is one of the only rooms that you can really feel like yourself. Go all natural as it were. It is here you can create your personal oasis of comfort and peace, and above all, it is only here that you can really be alone with your thoughts.

To create the perfect bathroom, everything around you should be pleasant to your eyes and evoke an atmosphere of satisfaction in order to reach maximum comfort. Therefore, when you have decided to take on a bathroom renovation project you should think over everything up to the smallest details. 

Think over the purpose and functionality of every component in your loo. Select matching light fixtures and create harmony in your choice of bathroom tiles colors with other bathroom elements. Decorate with purpose, with the various accessories designed exactly to create the theme and style you want to produce.

Read more: How to Convert Single Bathroom Sink to Double Sink

So, you decided to take your bathroom arrangement seriously, where shall we start with? Well to begin with,  you must measure the total area of the room.  If the radius of your bathroom is not that big, try to purchase fixtures that are not too bulky to take full advantage of the space. There should be enough space between bathroom elements so as to allow free movement without hindering or obstructing regular bathroom activities.

You need to decide what exactly you want to see in your bathroom: a shower stall can save you space, or if you have a larger bathroom, set a bathtub by itself in the middle of the room to add atmosphere and sophistication. In any case regardless of your choice of one or the other option you need to know the properties of the bathroom elements and accessories so you can create the look and feel that you want.

Choose a suitable bathroom sink, there are plenty of them, If you are really pressed for space, there are mini and corner sinks, which are perfectly suitable for small powder rooms. If you decided not to use wall hung bathroom units, you can instead install a nice cabinet under your washbasin, which are not only attractive but will give you additional storage space for bathroom all your bathroom accessories.

Read more: Installing a Toilet in Your Basement or Spare Room Without a Standard Plumbing Drain

Above the bathroom sink, you may install mirrors but you don’t have to limit yourself here, full length wall mirrors will brighten the room and give your small bath increased perception of space. Above the mirror, or next to it is advisable to install spotlights or lamps, which will light well every corner of your lovely smile in front of it.

A towel heater is not only a warm pampering luxury, but it has the added benefit of keeping mold at bay in your bathroom and off your fabrics.

In order to save space and enhance the ultra modernism of your bathroom design, you may use wall hung bathroom units. For a clean contemporary look, this is perfect because of the complete absence of any pipes, mixers, tanks because everything is hidden inside the bathroom walls giving your bathroom a simplistic trendy feel.

When buying a new bathtub you may choose one with a spa unit in it, these jetted tubs will make your everyday life more joyful and comfortable as the jet relieve your daily stress.

Accessories can make or break a bathroom so be sure they blend in harmoniously with the rest of your bathroom decor.

And it is also important to mention about your selection of color palette for your bathroom. If a room is small, try to avoid dark shades, which will only make the room appear smaller and cramped. Therefore, it is better to use light and soft tones making your bathroom more inviting and appealing to use.

Read more: 3 Popular Types of Bathroom Shower Faucets Examined

Installing a Toilet in Your Basement or Spare Room Without a Standard Plumbing Drain

Quick and Easy Toilet Plumbing

So the in-laws are coming to stay for the summer and there is no toilet in the basement or perhaps you would like to make it more convenient for a senior or handicapped family member but you don’t have the time or the inclination to rip up the basement floor or floor boards to put one in.

What do you do? Well the people over at Saniflo have just the solution you are looking for. All you need is a water and electric power supply.

If you need to put a bathroom where conventional plumbing makes it difficult or even impossible, Saniflo lets you put a toilet in any room in your house without the standard plumbing drains.

That’s right, you heard me correct, no floor drain needed! Saniflo requires no floor drain so you don’t have to break through the basement floor and the great thing is if you change your mind or want to move it to a different room, the whole process is reversible.

The way the toilet works is that when the toilet is flushed the toilet paper and excrement is sucked into the back of the toilet into a box where the waste is mulched and then the resulting broken down sewage is pumped through a three-quarter inch line into the houses main waste stack.

Read more: How to Convert Single Bathroom Sink to Double Sink

Works Anywhere You Need it

The process is called Maceration which refers to softening or breaking into pieces with liquid. With an improved design and flushing system, the Saniflo systems pump is quite capable so you can locate the toilet as far as 9ft below the sewer level or up to 150ft away.

Another added benefit is the small foot print of the system, the Saniflo toilets can be installed under the stairs or even in a closet if space is an issue.

The down side is the cost of The Saniflo system which can cost anywhere from $600-$1000 based upon the toilet model you choose.

Factoring in the installation, when everything is said and done can cost as high as $2000 but for the added convenience and flexibility of the system, the pros outweigh the cons if you are looking for a system that can be easily installed in your spare room or basement within a day.

Related terms:

toilet in basement old house basement toilet options basement toilet plumbing bathroom in basement without breaking concrete installing shower without breaking concrete

How to Convert Single Bathroom Sink to Double Sink

Want to know how to convert single bathroom sink to double bathroom sink? If you are thinking of converting a single sink to a double bathroom sink, the most important consideration in your bathroom renovation decision is to determine if you have enough space for adapting a single sink vanity into a modern double sink spread.

Sure, remodeling your only bathroom sink into a contemporary double sink masterpiece is a great way to update an older bathroom, and a pair of sinks is always better than one in a busy bathroom environment. But the last thing you want when converting a single sink to a double bathroom sink is to make your bathroom cramped and crowded.

Changing out your old bathroom sink for new practical dual his and her double lavatory sink basins should feel like a natural use of your bathroom space. If you are renovating your entire bathroom, then you have more space options for your single to double vanity sink conversion. But if you are simply replacing your single sink with a double sink set, then your options are limited. This guide will be helping you to convert single bathroom sink to double.

Looking for Discount Bathroom Vanities with Tops and Sinks? Here are the best.

How to Convert Single Bathroom Sink to Double – Step By Step

The Bump Test

The best way to test this is to have two people stand in your bathroom, in the space where the double sink vanity will be installed, and see if they feel like there is adequate space. If they can go through the motions of regular bathroom activities, like washing their face and brushing their teeth, at the same time without constantly bumping into each other, then chance are your space is good for converting a single sink to a double bathroom sink.

Once you have your space issues sorted out, the next step in converting a single sink to a double bathroom sink is to choose the design that suits your tastes and your needs. When it comes to remodeling your only bathroom sink into a contemporary double sink, do you have classic bathroom design tastes, or do you lean towards the more modern bath design spectrum?

If your tastes are traditional, and you’re looking at simply replacing your sing sink vanity with a double sink countertop design, then you should be able to find your double sink replacement in most home improvement stores.

However, if your design choices for transforming a solitary sink to double bathroom hand basins have a more modern bent, then you might have to turn to more high-end, bathroom specialty shops to find the dual sink design that’s right for you.

Do You Need to Update Your Plumbing?

Of course, when retrofitting your grooming space you have to take into account the plumbing.  More than likely you will have to make some changes to your pipes and fittings to accommodate the extra bowl. Just how far you want to go with the conversion will impose some limitations on the design of your double basin layout.

For example, you may want to simply go with a dual pedestal sink spread or two small lavatory vanities. However, chances are your plumbing is only designed to accommodate a single fixture, which means having to install a second set of drains and lines to accommodate your new arrangement. But if you want to lessen your construction without major plumbing adaptions in your bathroom, then you should consider a single vanity that contains two washing bowls.

This way, you can use the existing plumbing lines and tie both sinks into what you already have, hiding all of the plumbing within the single vanity. The good part is that all of the parts necessary will be available online or at your local hardware store.

Making the Most of Location

Renovating a single bath sink into a double is becoming a popular home improvement idea. As we get busier and space gets harder to find, compartmentalizing your layout makes practical sense. While double sink status is a relatively easy and straight-forward remodeling project, it’s important to take into account the amount of space that the conversion will take.

Remember that this means that two people will be occupying your bath at any given time so plan carefully to avoid conflict. But if you do have space, then converting a single sink to a double basin arrangement is a great way of redefining your grooming station and making more efficient use of your home.

Here are the top three popular types of bathroom shower faucets.

3 Popular Types of Bathroom Shower Faucets Examined

The three popular types of bathroom shower faucets are the overhead shower faucet, the handheld shower faucet, and the rain shower head. Based on the concept presented by the natural formation of waterfalls, shower faucets have been around since time immemorial, with numerous popular faucet designs developed and improved over time.

The falling water coming from the shower spout has always been preferred by millions of people worldwide because it is quick and efficient compared to taking a long drawn out bath using a traditional bathtub.

Aside from the fact that bathing with a shower faucet is very convenient, modern faucet design and innovation have also made it possible for households to save water while enjoying a delightful and cleansing bath which in turn has made shower faucets even more popular.

The overhead shower faucet is one of the most enduring and popular types of shower faucets found in bathrooms today. The handheld shower faucet gives you the most flexibility and allows better control of the water direction and a wide range of movements. The rain shower head is a newer and trendier popular shower faucet that makes it possible to conjure up the feel and look of a real rainfall.

We have compiled a list of the uses and benefits of three popular shower faucets that you can find in most bathrooms of today. When designing the bathroom, it is a must to consider the type of shower that you want to install, and making your choice can be quite daunting because of the wide range of choices available for shower designs.

Fortunately removing and replacing a shower head is an easy task; read on to find out more about the types of shower faucets commonly used in today’s modern bathrooms.

Overhead Shower Faucet

The ever-popular overhead shower faucet is a type of bathroom faucet that has been around for a long time. The ancient Greeks have used the concept in their communal and private shower rooms. It is a popular choice in most bathrooms because of the wide variety of styles and designs available.

This kind of shower faucet is fixed but you can adjust the angle of the showerhead and the pressure of the water while taking a bath. All you have to do is turn the shower on and take pleasure in a luxurious shower to freshen yourself up and cleanse your body from the dust, sweat, and smell that have accumulated after a whole day’s exposure.

Looking for Modern Bathroom Faucets? Here are the best.

Handheld Shower Faucet

The handheld shower faucet is the most popular faucet choices if you are after flexibility while taking your shower. You will find this kind of showerhead beneficial if there is a handicap in the house since it can reach areas that the overhead shower cannot. Caregivers will also find the handheld shower more comfortable to use because they can avoid getting wet while bathing their patients.

The common handheld type shower only needs to be connected to a regular faucet and very easy to install. Typically, you can find it mounted on a wall using a small clamp when not in use or when you want your hands to be free while scrubbing or lathering your body with soap. The flexible hose of the handheld shower allows better control of the water direction and a wide range of movements. You will find it very convenient to use when you bathe children, shampoo pets, and rinse bathtubs especially the far corners.

Rain Shower Heads

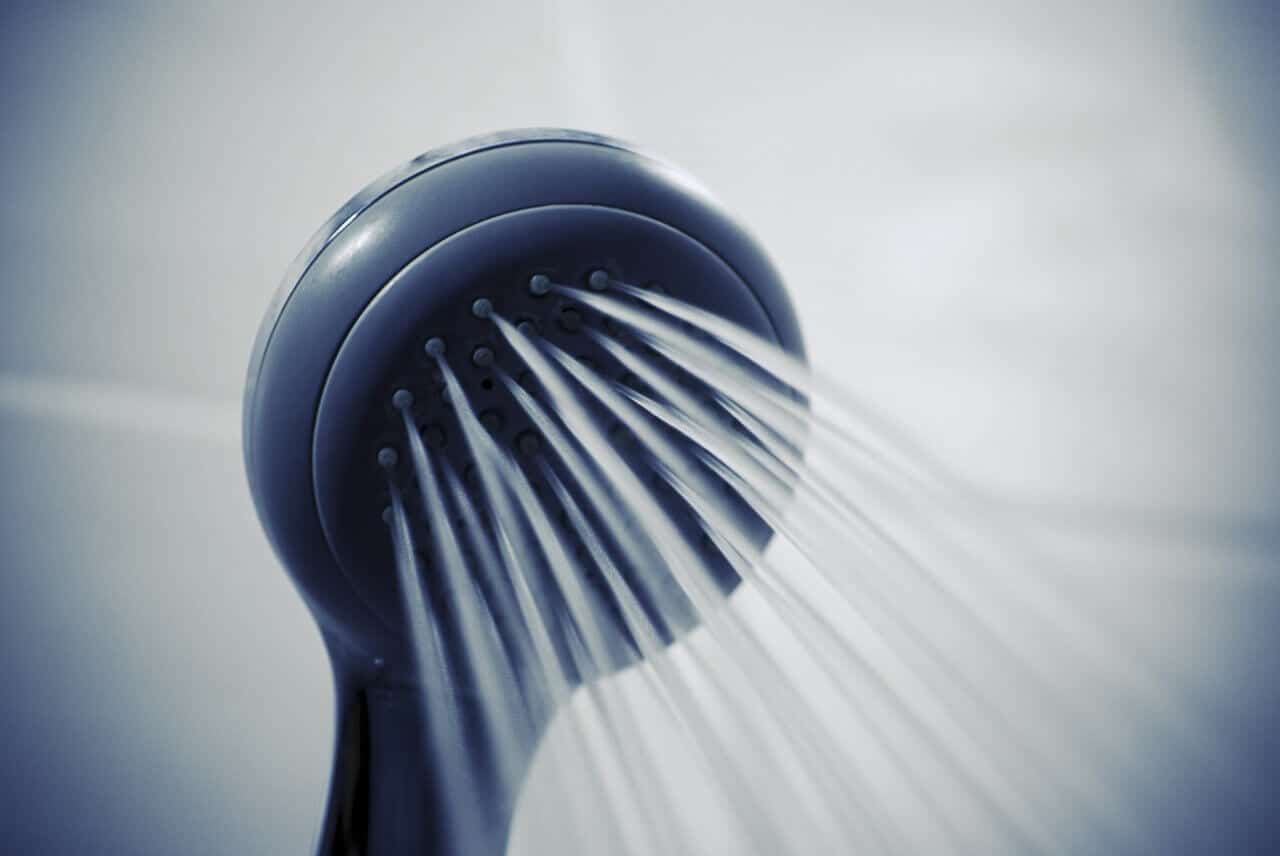
A newer and trendier type of popular shower faucet is the rain shower head. It is similar to a fixed shower head in the way it is installed but the difference lies in the enlarged face of the water sprayer that makes it possible to conjure up the feel and look of a real rainfall. It is usually equipped with multiple settings that allow the control of water coming from the nozzle spray so you can opt to enjoy concentrated downpour or linger under a drizzle.

As we often hear, you will get what you are paying for when purchasing a bathtub faucet. If you choose to buy the cheaper models, you will most likely find yourself in the hardware store looking for another shower faucet after just a few months. The more durable shower faucets usually come with a price since the materials used are of higher quality.

The high-end shower brands that have a good reputation in the market include American Standard, Delta, and Kohler. But buying the most expensive faucets is not a requisite in acquiring a shower that will last for long. You can also get a durable faucet by choosing something mid-priced but made of quality materials.

Most people either end the day or start the day with a shower or bath. So, making the right choice is crucial in achieving a shower faucet that will suit your taste and the style of your bathroom. Although the endless list of bathroom faucet options makes it difficult to make a choice, the 3 types of popular shower faucets mentioned earlier will help you narrow down the search.

Thinking of converting a single sink to a double bathroom sink? Here’s a guide.

How to Remove Shower Head that is glued on without Scratching

Removing shower head that is glued on when renovating your bathroom to update your bathtub fixtures is something we may all have to eventually do. If your old showerhead is outdated and you want to replace it with a more modern energy-saving showerhead or your showerhead is leaking and needs your immediate attention for removal, don’t panic.

However, if for some reason you are a bit intimidated by the thought of replacing your bathtub hardware, fear no more because this is a do-it-yourself shower head replacement guide that teaches you how to easily remove your existing showerhead. I will be showing you all the steps you need to take to remove shower head that is glued on without scratching.

The great thing about removing a showerhead when renovating your bathroom is that there is no need to spend your hard-earned dollars to hire a seasoned plumber to remove the showerhead. All you have to do is follow these few simple showerhead removal steps that will cost you next to nothing to get the job done right the first time.

Removing a showerhead that is glued on when renovating your bathroom is an easy way to spruce up your bathing area with minimal cost to you. The tools required for unloosening and removing a showerhead when renovating your bathing area are everyday household tools that are probably already lying around in your toolbox. The steps to removing a showerhead when renovating your bath can be done by anyone without the assistance of a plumber.

This do-it-yourself showerhead disconnection reference guide is quite basic but requires a few simple plumbing tools to successfully remove your showerhead. Take a deep breath, there is no need for anxiety because the equipment required for unloosening and removing a showerhead when renovating are everyday household tools that are probably already lying around in your toolbox just waiting for you to use.

Looking for Shower Head That Can Increase Water Pressure? Here are the best.

Gather the plumbing tools you currently have or make a list of the tools that you will probably need to purchase at your local home improvement or hardware store and you will be a step closer to rid yourself of that old tarnished dripping showerhead.

Here is what you are going to need to remove your showerhead when renovating your bathroom:

  1. Screwdriver
  2. Pipe Wrench
  3. Channel locks (optional)
  4. Masking Tape (optional)
  5. Wire brush (optional)
  6. Toothbrush (optional)

When removing a shower head if you are renovating your bathroom, keep in mind that some showerheads can be easily unscrewed without the use of any equipment at all. If this is the case, read the following showerhead removal section about safety and by all means, use your hands to screw the showerhead off the water pipe. However, this do-it-yourself guide has highlighted a specific set of tools to prepare you if your showerhead might be securely fastened to the water pipe.

Cautionary Steps to Take before Showerhead Removal Starts

Depending on your type of showerhead, before you begin working on the removal of the shower-head, for safety reasons, it would be best for you to find your household’s central switch-box and cut the electricity to the bathroom.

Some modern-day showerheads are directly linked to an electrical system that provides flash heat; by cutting off any electrical power, you will be protecting yourself from any possible mishaps so read the manual that came with your showerhead unit or go online to the manufacturer’s site and find the appropriate removal instructions.

In the event of an unlikely break in the water pipes when removing your showerhead, it would also be a good idea to similarly shut off your water supply. If the waterline does break, this preventative safety measure could save you from paying a hefty utility bill or unnecessary water damage to your bathroom. Without further ado, let’s get into the actual removal of the showerhead.

Directions on how to remove Your Showerhead that is glued on with wrench and Teflon tape without scratching

First off, check to see if your showerhead is fastened unto the water supply by small screws. If this is the case, get your screwdriver and begin loosening the screws. If the showerhead is firmly fastened and secured unto the water supply by couplings, this is where the pipe wrench or channel locks come in handy to remove the showerhead.

When removing your showerhead, whichever wrench you choose, it is always a good idea to layer the surface of the jaws with masking tape. If the showerhead to be removed is old, the tape is not necessary, but if the showerhead is being removed for minor repairs, then the masking tape will prevent any surface damage to the finish of the showerhead.

After placing the tape on the jaws of the wrench, begin turning counter-clockwise (this is the direction to loosen the showerhead) and the coupling should be loose with little effort. With showerhead removal, this is not a job to be done in haste, be patient and extremely careful when loosening the showerhead, for turning the coupling too fast can cause damage to wall-surfaces or even a break in the piping so take your time and apply steady even pressure to remove the showerhead.

The removal of the showerhead is your main objective, but accomplishing the mission needs a little more effort. After the disconnection of the showerhead, use a wire brush or toothbrush to remove pieces of Teflon tape left behind from the water-supply nozzle that had been previously put in place.

Such materials like Teflon are often used to wrap the threaded ends of pipes to reduce friction as well as ensure water tightness. The Teflon should be removed so that a fresh batch may be placed when reattaching your new showerhead.

Now that you have completed this easy do-it-yourself showerhead project, any intimidation previously felt towards the disconnection and removal of your shower-head should be long gone. This standard showerhead removal guide is solely built for your assistance; this tutorial is basic, to the point, and will surely help you to get the job done at little or no cost at all.

Stop wasting time and begin that shower removal job you have been putting off. Remodeling your bathroom with a new shower head is a simple and easy way to spruce up your bathing area with minimal cost to you.

Looking for Water-saving shower heads? Here are the best.

Bathroom Faucet Stopped Working [Top Fix]

This article is for you if your bathroom faucet stopped working. Diagnosing faucet problems in your bathroom is easy once you understand that no matter what type of faucet you have, faucets are designed to do just one thing and that is to control the flow of water coming into your bathroom.

When diagnosing potential faucets problems in your lavatory, the other thing you must realize is that all faucets have some type of valve mechanism along with other moving parts that must be sealed to prevent your faucet from leaking.

So besides occasionally cleaning out built up mineral deposits, the major cause of faucet maintenance problems in your bathroom will be the replacement of seals and valve components that have worn out or lost their resiliency over time. I have written this article to be a guide if your bathroom faucet stopped working at any time.

Diagnosing faucet problems in your bathroom is done either to replace or repair your existing faucet plumbing fixtures. When diagnosing potential faucets problems in your lavatory, you must realize is that all faucets have some type of valve mechanism along with other moving parts that must be sealed to prevent your faucet from leaking. Use these common faucets problems as a guide to help you diagnose any faucet problems you may encounter in your bathroom.

Looking for Water Efficient Shower Heads instead? Here are the best.

Diagnosing faucet problems in your bathroom is done either to replace or repair your existing bathtub faucet or sink faucet fixtures. The four major types of faucets are disc, ball, cartridge and stem faucets. On stem faucets, the most prevalent problem is the washer wearing out. For ball, cartridge and disc faucets, if they leak, the faucet problem is usually due failure in the washer or cartridge. It’s usually a good idea when you purchase a new faucet to keep the pull apart diagrams the normally come with your faucet model showing how the faucet was assembled.

These schematics will come in handy if you have to diagnose any faucet problems in your bathroom. If you didn’t purchase your bathroom faucet yourself, you may get lucky by searching the manufacture’s website to find a break down schematic you can use when repairing your leaky bathroom faucet. You can purchase your replacement parts at most well stocked home hardware or home improvement stores in your area.

Below you will find common bathroom faucet problems, use the problem-solving information to diagnose the faucet problems you are facing so you can determine whether you have to repair or replace the leaky faucet in your bathroom:

Water Comes Out Of Faucet Crooked (When Water Barely Comes Out Faucet)

If your water flow seems unnaturally slow, or water barely comes out faucet, the likely cause is the aerator or your faucet filter screen may be plugged. The solution for restricted water flow on your faucet is to replace or clean the filter screen.

How to Fix a Leaky Faucet in Bathroom

Have you ever experienced issues like leaks at base of faucet when turned on, bathroom faucet leaking from center hole, or faucet leaking at base? A leak at your faucets spout may indicate that the washer has become brittle (hard), somehow damaged or is just simply old and worn out. The solution to a leak problem at the faucet spout is to replace the seal or the washer.

When your stopper allows water to drain when it is closed, this could mean that the drain or valve is damaged. The solution to this faucet problem is to smooth it out or replace the valve. The other possible causes are the lifter is misadjusted or it could simply mean that the pop-up valve is dirty. If it is the lifter, then readjust so it closes properly. If the problem is a dirty pop up valve then clean it to make sure all parts are functioning freely.

If your stopper lever leaks, this could mean you have a loose lever nut so tighten the nut. Another possible cause for your stopper lever leaking is defective packing which means you have to replace the packing. Let’s not rule out a damaged or worn pivot ball because this can also happen. The solution here would be to replace the packing and ball.

A leak at your faucets swivel spout indicates that the o-ring has become hard, worn or is damaged, in which case the o-ring must be replaced.

When it comes to a loose faucet, it could be one of three problems. The first thing to look at would be to look and see if your faucet has a loose shank nut and tighten it. Or you could check to see if your faucet has a damaged rubber or metal shank washer, at which time, the washer will need to be replace.

When diagnosing bathroom faucet problems, a leak at the faucet lever or knob indicated that the o-ring or stem packing has become hard, worn or damaged and the solution to this faucet problem would be to replace the o-ring or packing.

If after examining your twin-faucet knobs you noticed they are misaligned, this problem generally means that your seals are worn or you installed the incorrect assembly, in which case you need to remove the knobs and either align or replace the faucet parts.

How to Fix Leaking Supply Line / Hose (Toilet, Under Sink, Washing Machine)

A leak in your supply line could mean a damaged slip-joint washer or a loose nut, so the solution to this faucet problem is either replace the washer or tighten the nut.

If you have a hose attached to your bathroom faucet and you notice that the water flow in your hose is cut severely, the first thing you should do is check your aerator or nozzle to make sure they are not plugged, if so clean or replace. There could also be a kink in the hose restricting the flow. Also check to make sure you don’t have a defective diverter valve that needs to be replaced.

Hopefully this small chart will help you diagnose any faucet problems you may encounter in your bathroom and if all fails, well maybe it’s time to replace that old outdated faucet anyway to spruce up your loo.

Here’s a guide to replacing bathroom sink faucet and drain.

8 Easy Do-It-Yourself Steps to Replacing Bathroom Sink Faucet and Drain

For the renovation newbie, replacing bathroom sink faucet and drain may seem like a daunting task but it is much easier than you might think. Not only can it be a great addition to your bathroom renovation project but you can also modernize the look of your vanity by simply replacing your old faucet with a new, more contemporary design.

Before you begin this bathroom renovation project, you will need a basin wrench for this project. This is a wrench used for plumbing, which has a long metal arm with a curved, pivoting claw at one end and a T-handle at the other end. The claw has teeth that run along the inner side of the curve. It grips the nut on the faucet and is meant to be used in places that are difficult to reach.

Follow these simple steps to installing your new bathroom sink faucet and drain

Step One – Select the right faucet

There are hundreds of different types and styles you can choose from for your new faucet. However, it is important to select a faucet that will fit your sink as well as fit into your overall bathroom theme.

All faucets have two threaded posts that will fit down through the holes of the sink. Nuts and washers secure these posts underneath the sink. The center set, which is the distance between the holes, needs to match up between the holes on your sink.

Almost all bathroom faucets and sinks use a standard 4-inch post and hole spacing. It is usually 4 inches between the centers of the faucet posts and between the holes in the sink. Almost all faucets are universal and will fit your existing sink unless it is old or is an unusual style. Take a quick measurement before you buy just to be sure it will fit.

Looking for Discount Bathroom Vanities with Tops and Sinks? Here are the best.

If there is a single-set faucet, it will utilize individual pieces that each fit into one hole in the sink. Some sinks have an odd center to center spacing. In this situation, you will likely need to use a single-set faucet because they interconnect with hoses underneath the sink. They can easily adapt to hole spacing that is more or less than normal.

Step Two – Shut off the water

The very first thing you must do is shut off the water. You can do this by using the stop valves under the sink. These stop valves supply and control hot and cold water to the individual faucets.

Step Three – Confirm the valve closure

Once you close the stop valve, be sure to check that they have shut off the water flow completely. In some older valves, the valves have been known to stick in a partially open position. If this happens, just shut off the water flow to the entire house. Plus, if the valves do not close completely, you will want to replace the valves, as well as the faucet.

Step Four – Remove water lines

Once the water is off, you will need to remove the water lines between the faucet and the two stop valves. The vertical arm that comes down through the faucet and connects to the horizontal drain stopper arm needs to be detached. To do this, just loosen the thumbscrew or spring clip on the stopper arm and slide the two arms apart.

Step Five – Now it is time to use your wrench.

Lay on your back under the sink. Position the wrench with its claw side up, toward the faucet until the claw wraps itself around the nut that is holding the faucet under the sink. The claw pivots after it grasps the nut. You will then be able to put pressure on the handle and turn the nut until it comes off. When it is time to put the nut back on, all you have to do is flip the claw to the other side of the wrench shaft and use it in reverse.

Step Six – Removing old faucet

Remove both of the nuts and the two washers. Remove the old faucet.

Step Seven – Install the new faucet

Now it is time to put in your new faucet. If your new sink needs to be assembled, you should do so according to the manufacturer’s instructions. Slip in your new faucet, put on the nuts and washers, and tighten from below with the basin wrench.

Step Eight – Connect water lines

Connect the stopper arm and the water lines. Turn the valves back on, and your new faucet is ready to be used. That wasn’t so bad. Next time you have the urge to remodel your bathroom, it will be just like riding a bike, so grab that basin wrench and let’s get started.

Has your bathroom faucet stopped working? Here’s a guide to fixing.

Kohler Faucets Repair Tips – Dealing With Bathroom Faucet Issues

Looking for Kohler Faucets Repair Tips? Kohler faucets are among the most innovative, elegant and resilient bathroom faucets available to bathroom remodelers and add a special touch to the backsplash of color and design in any bathroom.

However, as with most types of bathroom fixtures and plumbing supplies, there comes a time when moving parts become worn out from repetitive use and you have to consider looking for Kohler faucet replacement parts in lieu of faucet repair.

Given the wide array of Kohler faucets that are on the market from Kohler shower faucets, Kohler tub faucets and Kohler sink faucets, you need to know how to troubleshoot common Kohler faucet and valve problems when the time comes. This job can become a bit more complicated if you don’t know which one of the types of Kohler faucets you have and as such which Kohler faucet replacement parts you need to purchase.

Repairing your Kohler faucet is not that difficult with the proper tools and know-how. In this article we will give you useful do-it-yourself tips on how to replace and fix Kohler faucets along with simple plumbing terminology that is used in the world of plumbing to help you along the way.

Kohler faucets repair tips are essential to maintain your bathroom fixtures. If your Kohler faucet is leaking you can repair it yourself to save some money. Knowing whether you have a Kohler compression faucet or a Kohler washerless faucet will help you identify which plumbing supplies to purchase when troubleshooting common Kohler faucet and valve problems in your bathroom.

Before we get into the “nuts and bolts” of how to repair a Kohler faucet, it is necessary to identify the different types of Kohler faucets that are on the market and how they operate. In essence you will find that there are “compression” and “washerless” Kohler faucets that you can install in your bathroom.

Looking for Cheap Bathroom Faucets under $100? Here are the best.

Whether tub faucets, sink faucets, or shower faucets, the type that you decide to choose for your bathroom renovation projects or that you currently have will depend on the placement, beauty, and functionality of your faucets. Some homeowners often prioritize beauty over functionality, but it is essential that both aspects of bathroom water equipment complement each other.

The definitions for compression and washerless faucets are as follows:

Compression faucets use rubber washers that over a period of time become useless due to wear and tear. These types of washers are used to seal the valve seat and once they become faulty, you will notice that the faucet begins to leak either from the spout or base. These types of Kohler faucets are common with those that have two handles that control the hot and cold water flow.

Washerless faucets can either be ball, disk or cartridge. The design and functionality of each will vary, but these types of Kohler faucets last longer than the other Kohler accessories and fixtures mentioned above. These types of faucets are also known to develop leaking problems as well and these can easily be fixed by replacing the O-ring or neoprene seal.

Once you have identified the types of Kohler faucets that you have in your bathroom and have determined the faucet problems then the next step will be to get the necessary tools to fix the leaking areas. At times it may be necessary to remove and install a whole new faucet assembly, but this is usually the last resort if all the tips we provide below about how to fix a Kohler faucet that does not function properly.

The tools you will need to fix a Kohler faucet are:

  1. Adjustable pliers
  2. A flat point or Phillips screwdriver that will fit your specific screw size
  3. Crescent wrench
  4. Duct tape
  5. Distilled vinegar
  6. Scouring pad
  7. Rag
  8. Deep Socket Set
  9. Needlenose pliers
  10. New washers and O-rings according to the model of your Kohler faucet.

The steps involved in fixing your Kohler faucets are:

  1. Place the rag over the mouth of the drain where the bathroom faucet hangs to ensure that small screws or anything else does not fall into it.
  2. Remove the decorative handles of your Kohler faucets. This can be done with either the flat edge of a Phillips screwdriver depending on the model of your faucet. It does not matter the type of faucet that you have whether it is compressed or washerless, the removal of the decorative handle first will allow you to get into the interior of the faucet.
  3. When you have removed the decorative faucet handle then the next step will be to unscrew the packing nut that is held tightly in place. You should use the duct tape over the mouth of the wrench to ensure that you do not damage the thread in your Kohler faucets. It will also be necessary to remove both the handle screw and handle if you want to stop leaking Kohler bathroom faucets from adding extra costs to your monthly utility bill.
  4. The washer in your Kohler faucet may be difficult to remove so you will need to use a pair of needlenose pliers to reach it. If you are using a washerless Kohler faucet then you will need to remove the O-ring and replace it also.
  5. The sediments in water forms deposits over time. If you have been using your Kohler faucets for some time then there may be a build-up of lime or other deposits in or around it. You can use distilled vinegar and a scouring pad to remove the water deposits before you place your new Kohler faucets in place.

It is well known that Kohler offers a wide range of styles, colors and faucet finish materials to match just about any homeowner’s individual taste when it comes to bathroom faucets. The great thing about Kohler faucets is that they employ features to help with the installation process such as flexible connections that increase mobility.

Looking for water-saving shower heads and the brands? Here are the best.

And most Kohler two-handle bathroom faucets have pre-assembled handles and valves that save you time when assembling. However, while Kohler faucets are made to last for years of exceptional service, nothing endures forever. Knowing how to maintain and fix your Kohler shower and bathtub faucets will not only prolong the life of your investment but will also instill peace of mind because your bathroom will function properly and look good as well.