
How to Install Mosaic Tile in Your Bathroom / Shower
Begin installing mosaic tiles by first examining the sheets of mosaic tiles that you have purchased to verify their condition and mosaic backing type. Glass mosaics tile sheets usually come with a thin plastic film on the front surface of the mosaic tile to hold the tiles together.
Installing glass mosaic tile sheets is basically the same as installing marble mosaic or ceramic mosaic tiles, the only real difference being that ceramic or marble mosaic tiles are normally mounted from the back on fiberglass netting, plastic mesh, paper, or threaded backing.
Most mosaic tiles are glass or high-fired porcelain which makes them impervious to wetness in your bathroom. The good thing about installing porcelain mosaic tiles in your bathroom is that they come in glazed surfaces for walls and alternatively non slip surfaces for your bathroom tile floors. When installing mosaic tiles, a starting point on your bathroom floor or wall must be established and should be marked as to where the mosaic tile sheets are to be laid down.
Read more: How to prevent mold in bathroom with and without fan
Just remember when installing your tiles to mark and level the guidelines at right angles to each other depending upon the size of the mosaic tile sheets to be installed. To get started with your mosaic tile installation, marks off the squares of a couple of sheets, making sure the guidelines are horizontal and vertical to establish a level pattern.
“Summary: Learning how to install mosaic tiles in your bathroom has been made a lot easier by mosaic tile sheets. Installing glass mosaic tile sheets is basically the same as installing marble mosaic or ceramic mosaic tiles, the only difference when installing ceramic or marble mosaic tiles in your bathroom is that they are normally mounted from the back on fiberglass netting, plastic mesh, paper, or threaded backing.”
Once the mosaic tile grid has been marked on your bathroom floor or walls, the adhesive, which is a polymer-modified thin-set (or epoxy adhesive) should be spread over the work area using the smooth surface of a ¼ inch notched trowel. Then the beveled v-edge of the notch trowel can be used to remove excess adhesive by establishing a 45-degree angle with the trowel and just putting enough pressure to remove only the excess epoxy adhesive. Work the adhesive just inside the grid lines you have set on your bathroom walls or when installing mosaic floor tiles. Be careful not to cover the lines so you have a visual guide to work with and this allows you to place the mosaic tiles right on the lines for greater accuracy.
Read more: Bath Renovating For Dollars!
After the adhesive has been applied to the base, begin by applying the mosaic tile sheets with the plastic film toward if you are using glass mosaic tiles or the fiberglass backing away from you, if you are using marble or ceramic mosaic tiles. Set the corner of the mosaic tile sheet just inside the corner of the layout lines. On your bathroom walls, gently press and tap the mosaic tiles in place with a sponge trowel or float to set the mosaic tiles firmly into the mortar adhesive (if you are installing mosaic tile on your bathroom floor, you can use a beater block and rubber mallet to achieve the same results).
Make sure all mosaic surfaces are flat and level, as mosaic tile has a tendency of highlighting any imperfections. Special note; it is imperative that all mosaic tiles bases are covered in adhesive, you can check this by gently lifting up an edge to ensure full coverage.
Make sure the edges of each mosaic tile sheet are level with its adjoining neighbor and all the joints are aligned. On mosaic tile floors, you can use a metal straightedge to keep the joints straight. If you need to adjust the alignment or cut your mosaic tiles to fit around an obstacle you can use a utility knife to cut the backing of your mosaic tiles in the shape of the object such as around a soap dish or toilet base and then manually strip away the unneeded mosaic tiles or you can use tile nippers (snap cutters) for a more precise cut.
Read more: How to Remove a Toilet
Make sure the tile adhesive is completely hard and dry, approximately three hours, at which time if you are using glass mosaic tiles, you can begin to remove the plastic sheeting at a diagonal angle to the tiles. It should go without saying that if there is any movement of the tiles, then you should let the mosaic tiles sit longer before you attempt to remove the plastic film from the mosaic.
When installing mosaic tiles, the recommended waiting time before grouting your vertical mosaic tile walls is twenty-four hours and the suggested wait time for bathroom floors is forty-eight hours after the tile adhesive has dried before being walked on and then proceeding to grout your mosaic tiles. Mix un-sanded grout according to the manufactures specifications and then using a rubber float by means of vertical and horizontal strokes spread the grouting cement, applying a light pressure to assure the grout joints are all filled. You can use your rubber float at a diagonal angle to remove any excess grout.
Once the grout begins to set you can clean the surface of your mosaic tile. JFYI this grout setting time will vary depending upon the surrounding room temperature and normally ranges for thirty to sixty minutes.
Removing excess grout can be done by gently using a slightly damp sponge, be careful here not to scrub the sponge as this will unnecessarily remove the grout from the joints. Another point to remember is that this process has to be done before the grout has completely dried or else your tiles will look dull and faded.
If you were unable to remove all the excess grout with sponging, have heart, the grout film can still be removed using a specially formulated acid based grout cleaner that you can purchase from any home improvement store. For thicker grout removal, you can use (000) steel wool to gently get rid of the excessive grout. Your grout will usually take twenty-four to thirty-six hours to dry.
Read more: Drywall Renovation Problems
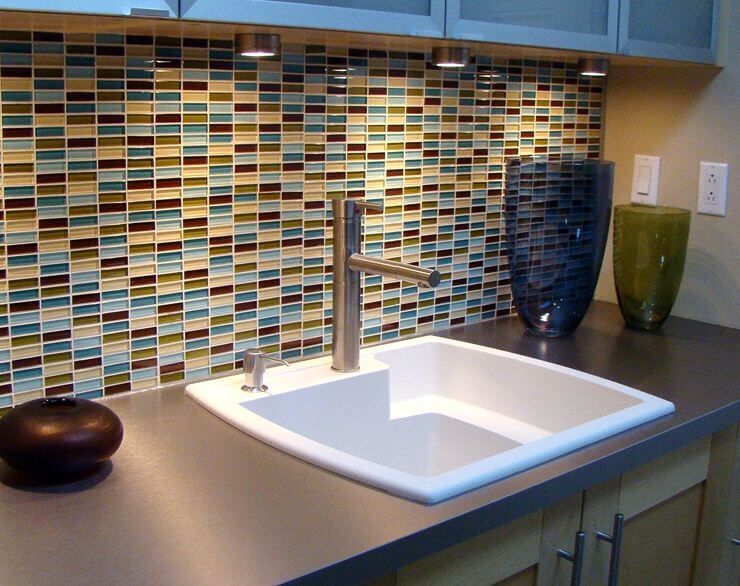
These instructions for installing mosaic tiles can also be used when installing a ceramic tile backsplash, mosaic tile countertop or even a tile backsplash mural in your bathroom. Learning how to install mosaic tile has been made a lot easier these days with the mosaic tile sheets as compared to the days when you had to install each tiny tile individually.
There is even a mosaic meshed glass tile available now. The other advantage of using a mosaic tile is that the small tiles make it easier to fit around obstacles in your bathroom. And with the variety of colors, shapes, and geometric figures, mosaic tile could just be the creative tile solution you are looking for in your bathroom.