
How to Solder Copper Pipe with Water In It
Tried, Tested and Truly Versatile Plumbing Material
Many first time home renovators are intimidated with copper plumbing because of its unforgiving nature. While it is true that copper can sometimes be a little tricky to work with, it is also a very stable, resilient, and versatile plumbing material.
Unlike plastic pipes, copper pipe takes special tools and practiced skills to get it right. Just be aware that you will be using a red hot soldering torch with equally hot solder in order to sweat the joints probably in a tight or enclosed cupboard space.
Read more: How Much Space Do You Need?
But it’s not as intimidating as it sounds. Once you learn to respect the medium, soldering copper tubing will just be another skill you can use in your arsenal of tools when remodelling or renovating your bathroom.
The tools you will need when working with copper pipe are:
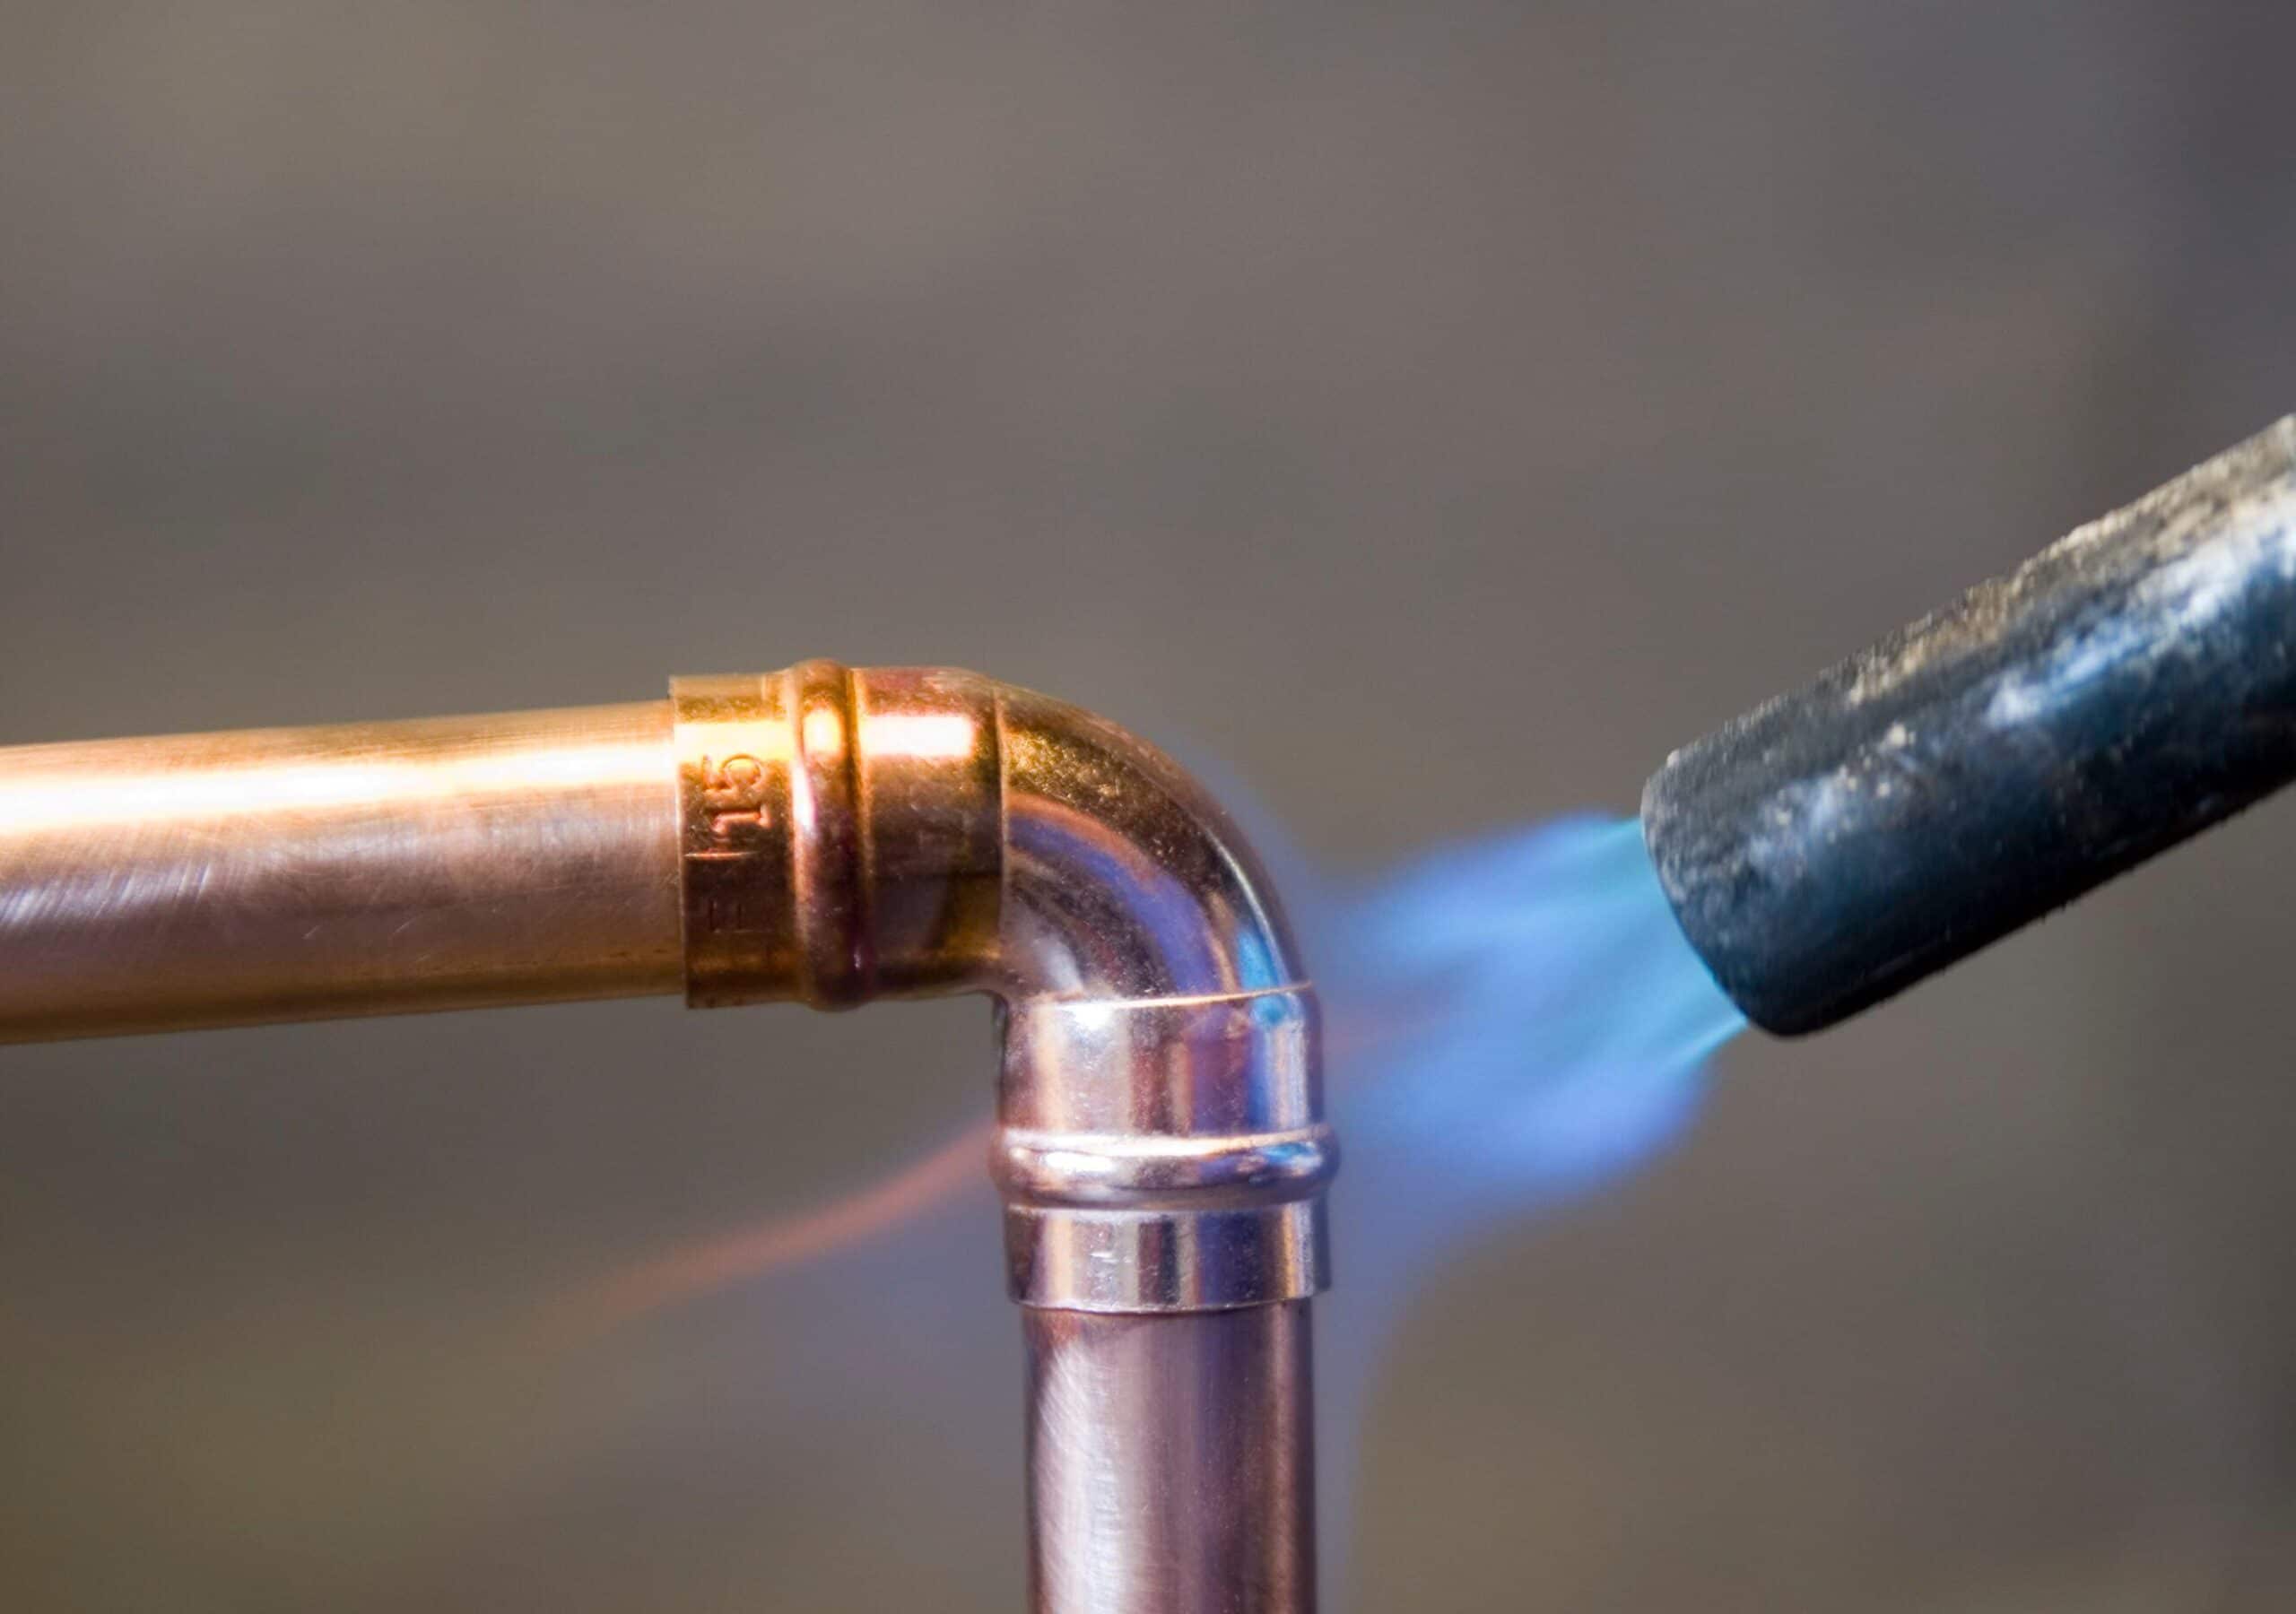
1) Copper tubing and fittings
2) Wheel cutter for cutting copper pipe
3) Soldering torch and solder
4) Gloves and protective welder goggles
5) Cleaning tools (wire brush or soap free abrasive scrubbing pad and rag)
6) Flux and brush
If you need to cut your copper pipe to size you can use a wheel cutter or a miniature hacksaw to get the job done. Before you can use the copper pipes you first must to utilize your wire brush to clean the copper tube ends called hubs.
It is required that you clean at least an inch at each end, both inside and outside the copper tube until each pipe end is shiny. Next generously spread on flux onto the copper pipes end as well as the inside of the fitting using a small brush. Be sure to wipe off any excess flux using your rag.
Read more: The Top 5 Bath Sink Materials
The Proper Application of Solder
On this plumbing project, before you solder, it is easier to hold the material if you unravel about thirty inches of solder from the spool and wrap it around your palm so it is easily accessible and offers you better control when applying the solder.
As a precautionary measure, it is important that you remove any plastic or rubber parts from the shutoff valve because you don’t want the heat to damage them.
Using your soldering torch, heat both sides of the lowest hub on the pipe fitting until it is hot. Gently press the solder to the fitting and continue to heat the fitting until the heat causes the solder to melt.
Continue around the pipe until it is surrounded by solder. It is important to note here that before the solder solidifies, you should wipe away any excess solder from each joint before it hardens. And make sure you wipe away from yourself because you don’t want hot solder getting on you.
Read more: The Crazy Things That Get Stuck in Your Toilet and What to do About it!
While some copper plumbing jobs may involve some tricky soldering and the thought of working with a solder torch in a confined space may not be appealing or even wise for some people, it is still a learnable skill that will provide you with the satisfaction that you did the job your self and in the process saved some money on your bathroom renovation project.