
Installing Under-Floor Electric Radiant Heat
Keeping Your Bath Warm and Toasty
Electric radiant heat can be installed under brick, ceramic, porcelain or stone tile in your bathroom and is usually put in directly over the floor substrate whether it is plywood or concrete.
The way it all works is a power cable provides electricity to the heating elements then a sensor bulb relays the temperature back to the thermostat.
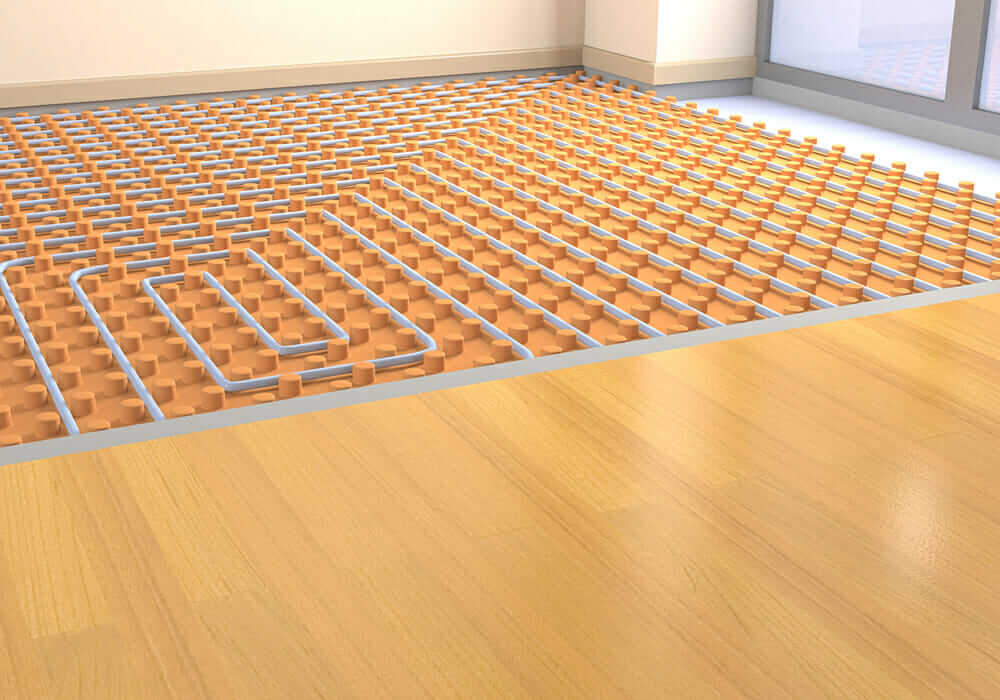
One effective radiant heating system consists of a plastic mat with heater cables interwoven between the mats interlaced surface. After the heat elements, power cable, sensor bulb, and sensor wire are in place, the mat is fixed in position by embedding it in a thin layer of thin-set before the floor surface material is placed over it.
Read more: The Ultra Contemporary Trend of Wall Hung Fixtures
You can then control the temperature through a wall-mounted thermostat or timer that allows you to heat your floors at a pre-set time and temperature.
Needless to say, turn off the power to your bathroom before attempting to do any electrical work. It would be best to install a large capacity box for the thermostat about eye level off the floor.
Just make sure the 120-v circuit meets with GFCIstandards and is well protected. You should note here that the wattage you will need will also increase with the larger size ofyour bathroom, so check the manufactures specifications to make sure your wattage is adequate for the size of the mat you purchased.
Also, note that you should never overlap mats. And it is a definite no, no, to cut a mat to fit your room. If for any reason your mat is damaged such as a cut or nicked heating wire, never under any circumstance try to repair it yourself unless you want the mat shorting out or causing a fire. The whole mat must be replaced unconditionally.
Read more: How to Use Invigorating Scents in Your Bathroom
Estimated Time and Tools for Completion
The estimated time the whole project should take is approximately about eight or nine hours to install the mat, wiring and surface tile in the average homeowner’s bathroom. This does not including prepping the area by roughing in the plumbing or possibly installing the subfloor.
The skill set you will need includes: setting tile, installing electrical boxes, connecting wires to terminals, which will probably involve splicing and stripping wires.
The tools you will need for this bathroom renovation project are but not limited too: tools for laying the flooring, drywall saw, stripper, lineman’s pliers, screwdriver, drill, half-inch bit, and a digital ohmmeter.
Fish tape, a hot-glue gun (to bond power cable to the substrate) and a three-eight inch trowel will also come in handy. Of course, you will need the radiant heat mat, armored power cable, box, 12/2 cable power source, and a timer or thermostat.
Read more: Designing a Safe Bath for Your Children
For the floor you will need surface flooring material, thinset to hold it all down and mortar or grout to fill in the gaps between the tiles.
The key to how well your floors perform is how well the surface flooring material conducts the heat.
The best materials for this are ceramic tile and stone. Solid materials such as laminate are much better conductors compared to a material such as carpets which provides way too much insulation.
Vinyl can also be used but you have to keep an eye on your temperature with this textile. And don’t forget to carefully plan your wiring, place the thermostat as close as possible to the power source because this will increase the efficiency of the electrical radiant heating system in your bathroom and allow you to reap the benefits of your radiant success.
Read more: Sound Proofing Your Bathroom